
How to create a new form
LeadPass forms allow you to capture email leads and deliver lead magnets in one simplified experience. The LeadPass form creation process consists of five easy steps. This guide walks through each step so you know exactly what to expect.
What you'll need before you start: a name for your form, a headline and short description for your audience, and (optionally) a file to deliver when someone signs up.
Step 1: Create a new form
From your Dashboard, click Create Form.
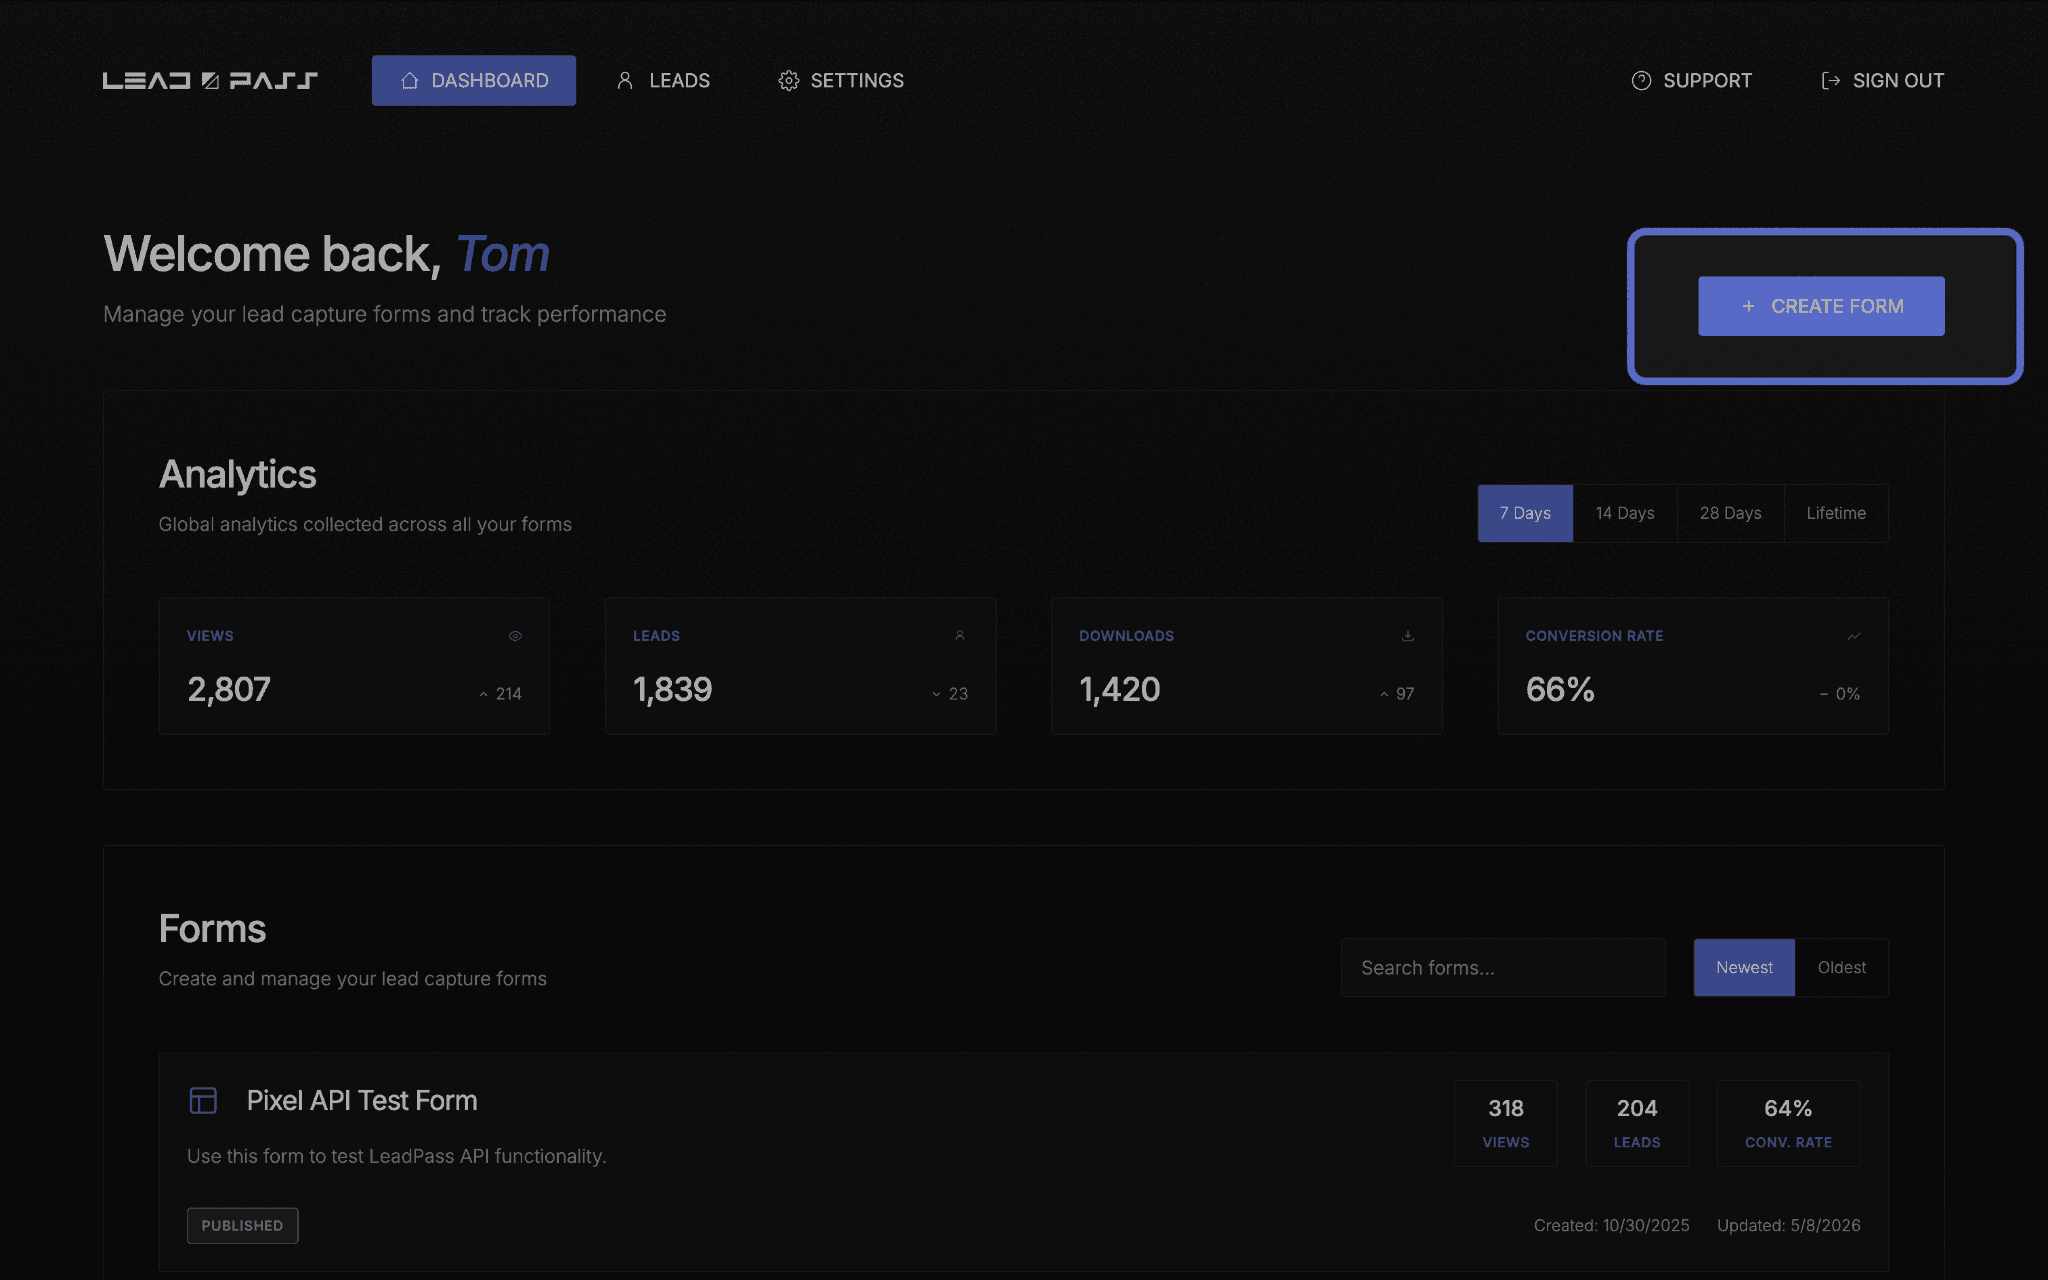
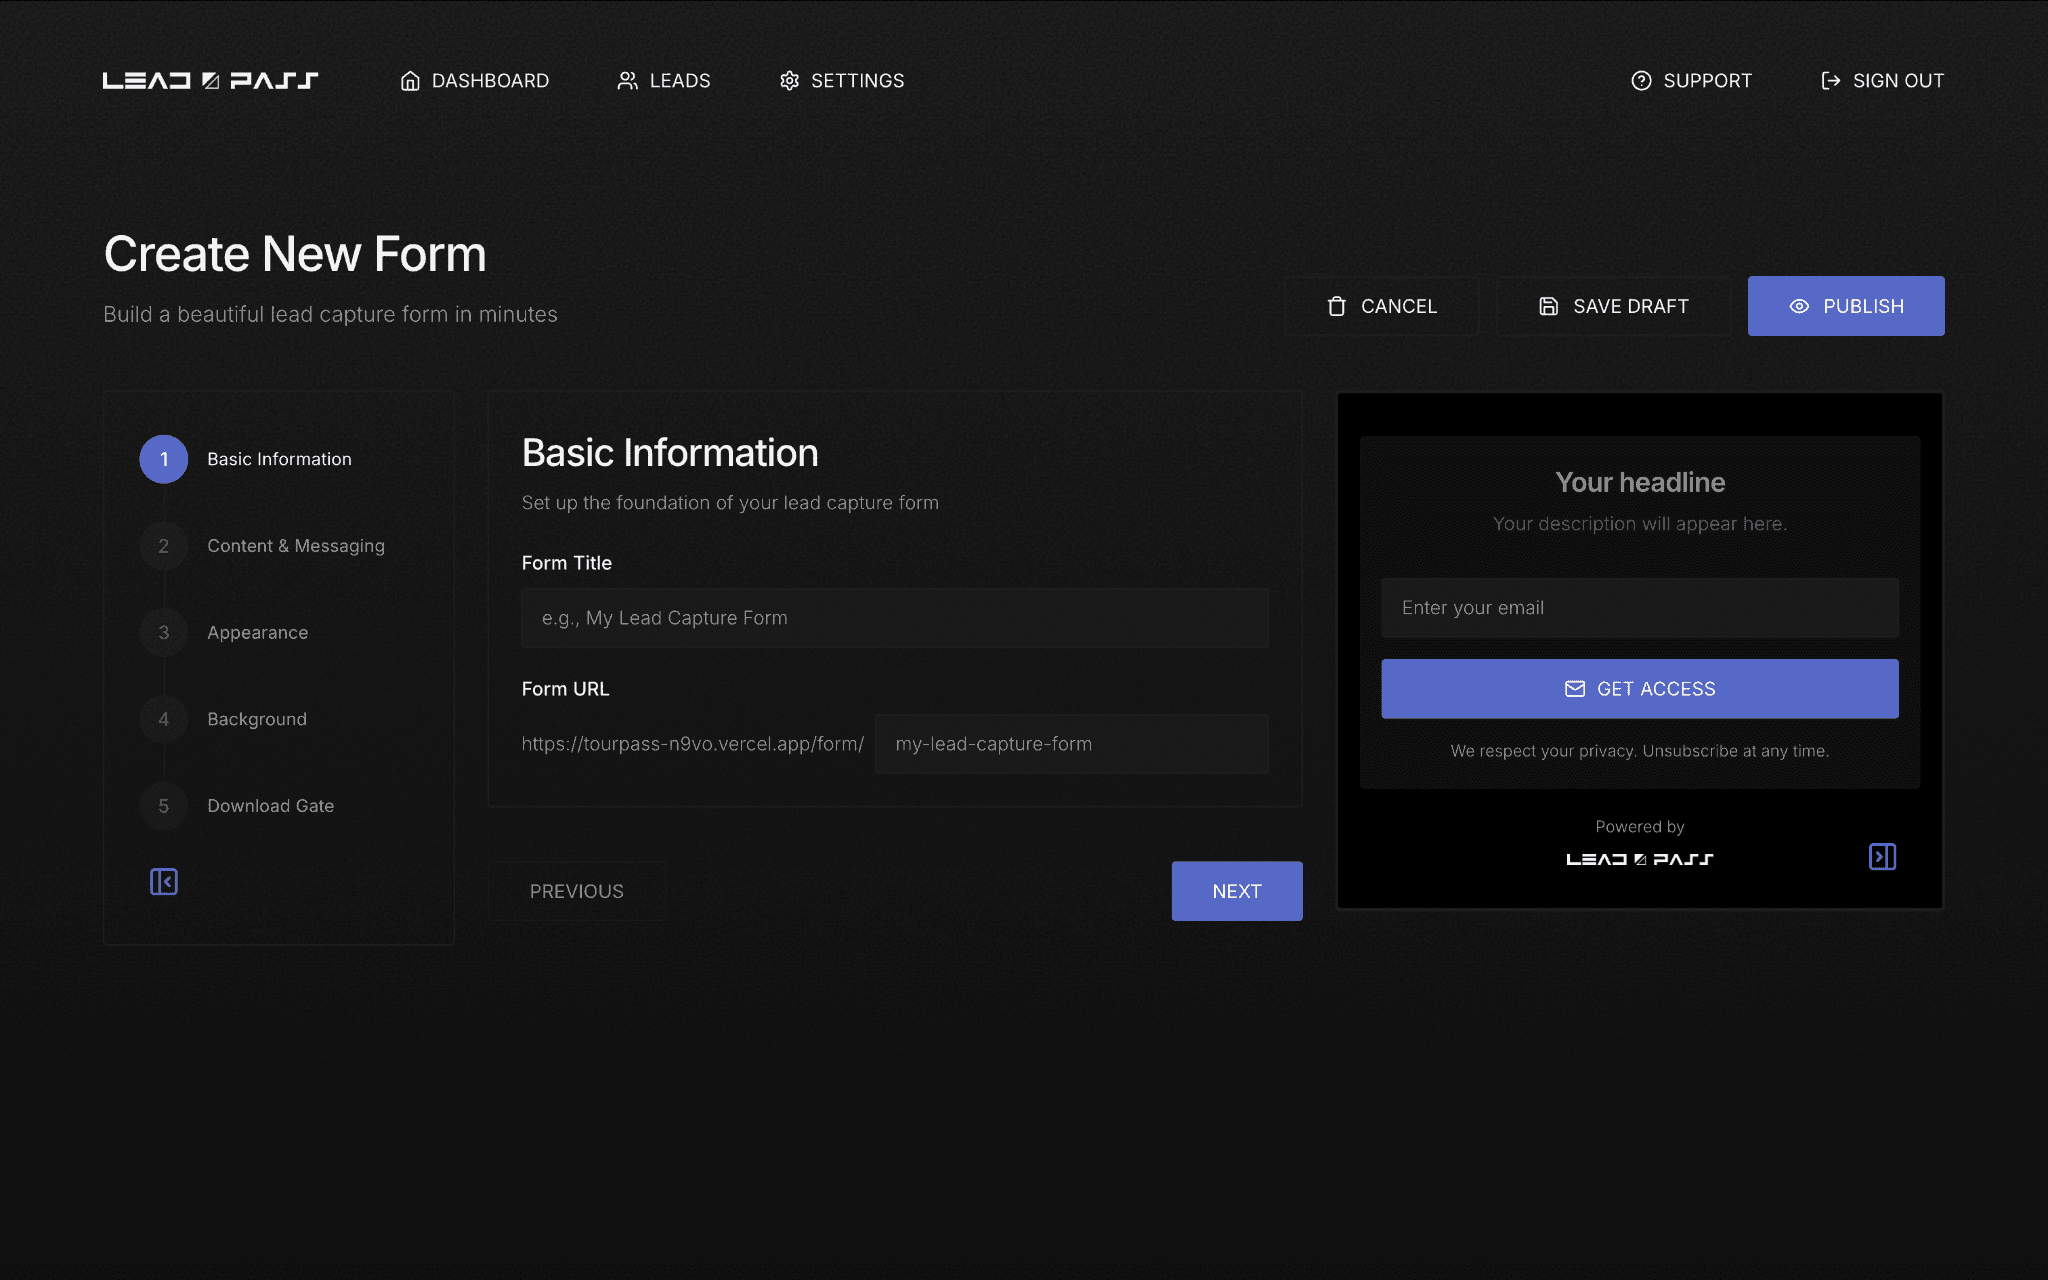
You'll land on the form builder — a 5-step flow with a progress tracker on the left and a live preview of your form on the right (desktop only). As you fill in each step, the preview updates in real time, so you always know what your audience will see.
Step 2: Basic Information
This is where your form gets its identity.
Form Title — an internal name for your reference (e.g., "Free Guide Signup"). Your audience won't see this.
Form URL — this becomes your shareable link: leadpass.to/your-form-name. Keep it short and easy to say out loud if you'll be mentioning it on video or in person.
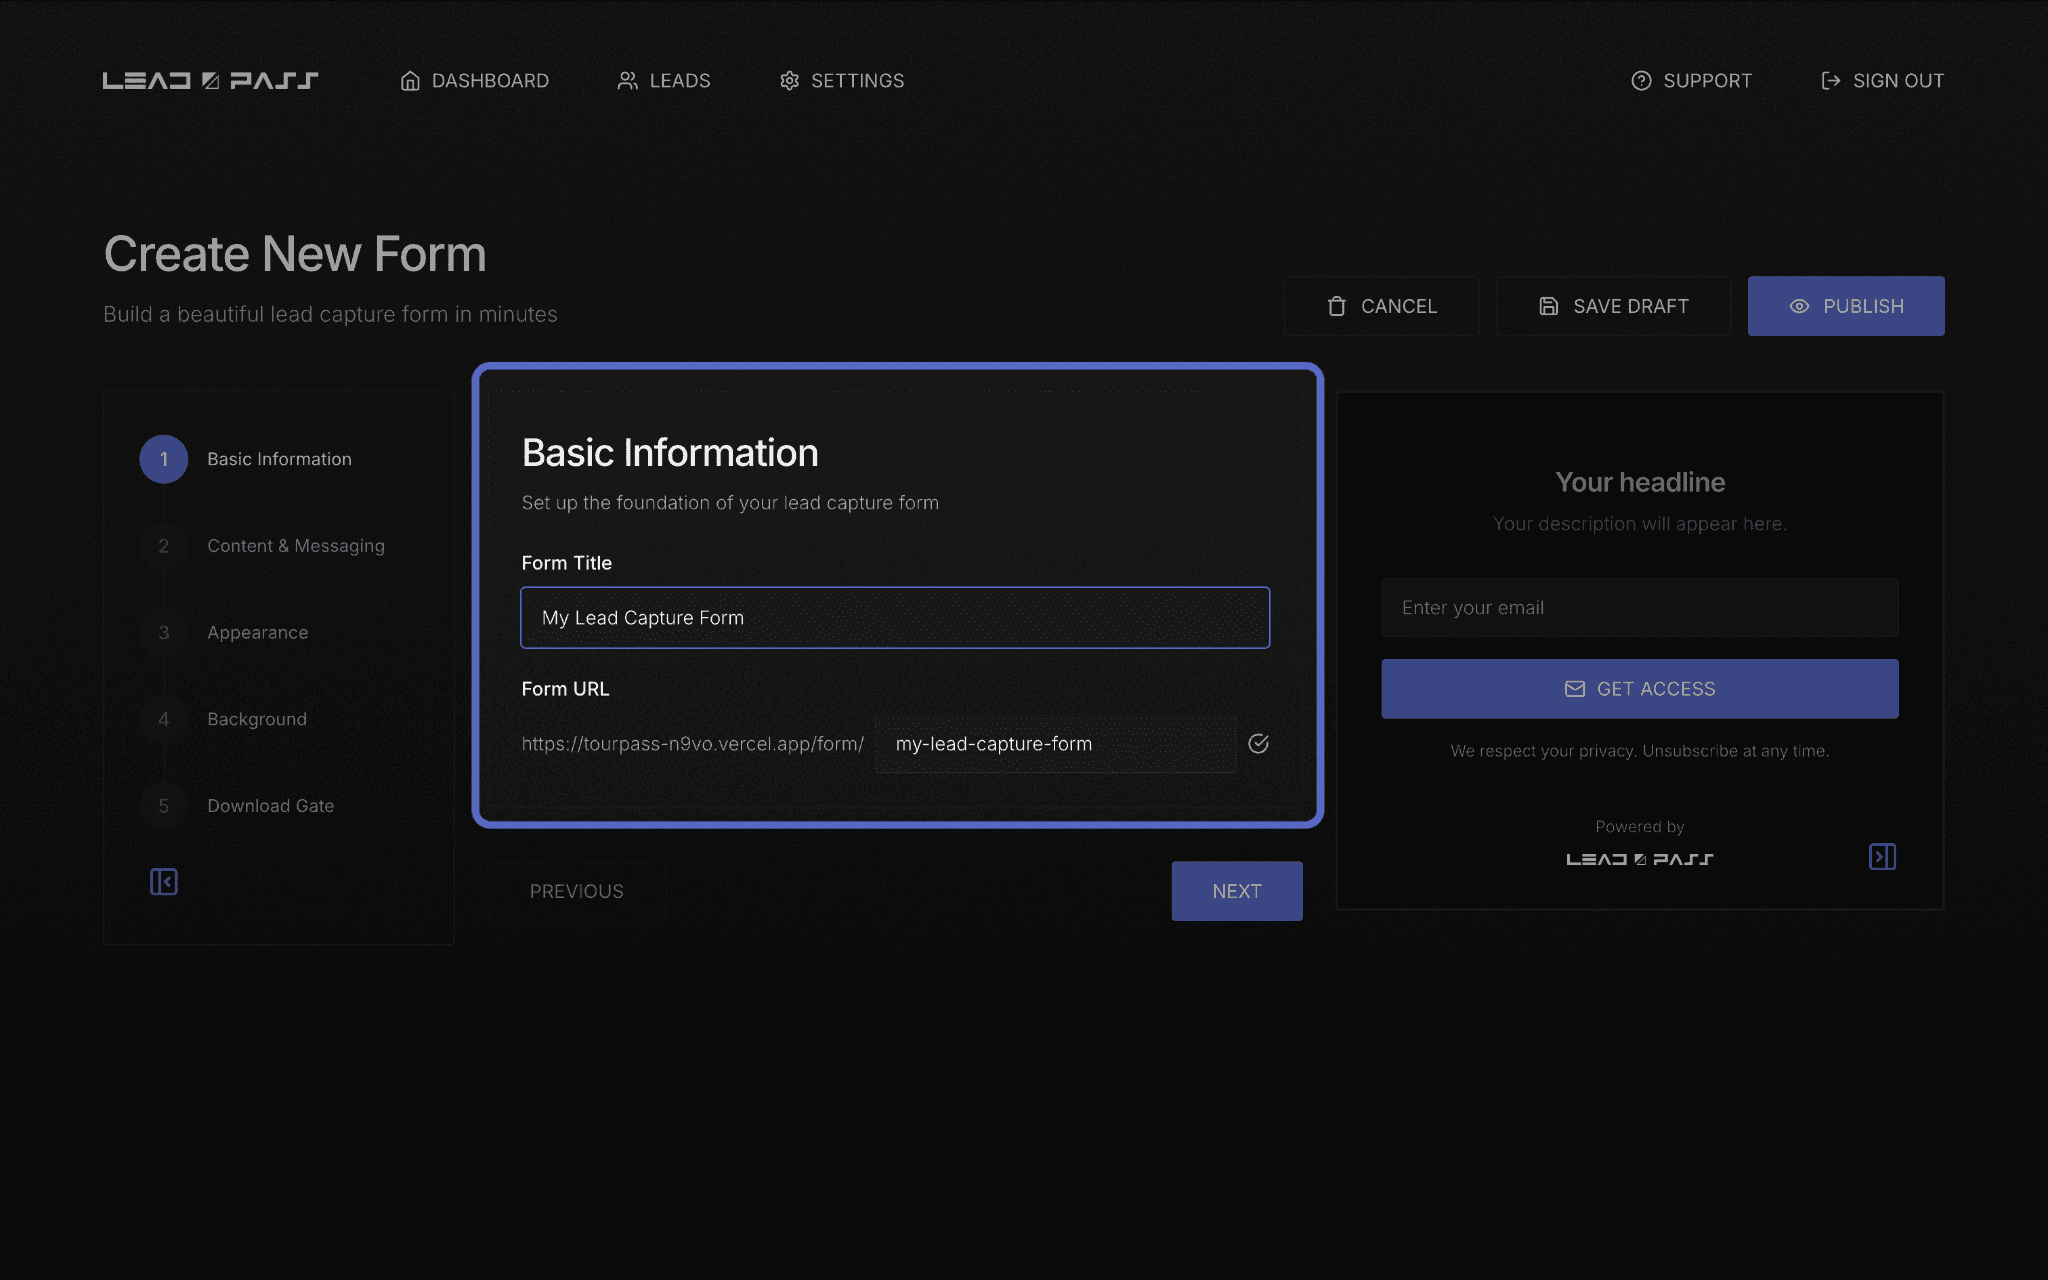
Click Next when you're ready.
Step 3: Content & Messaging
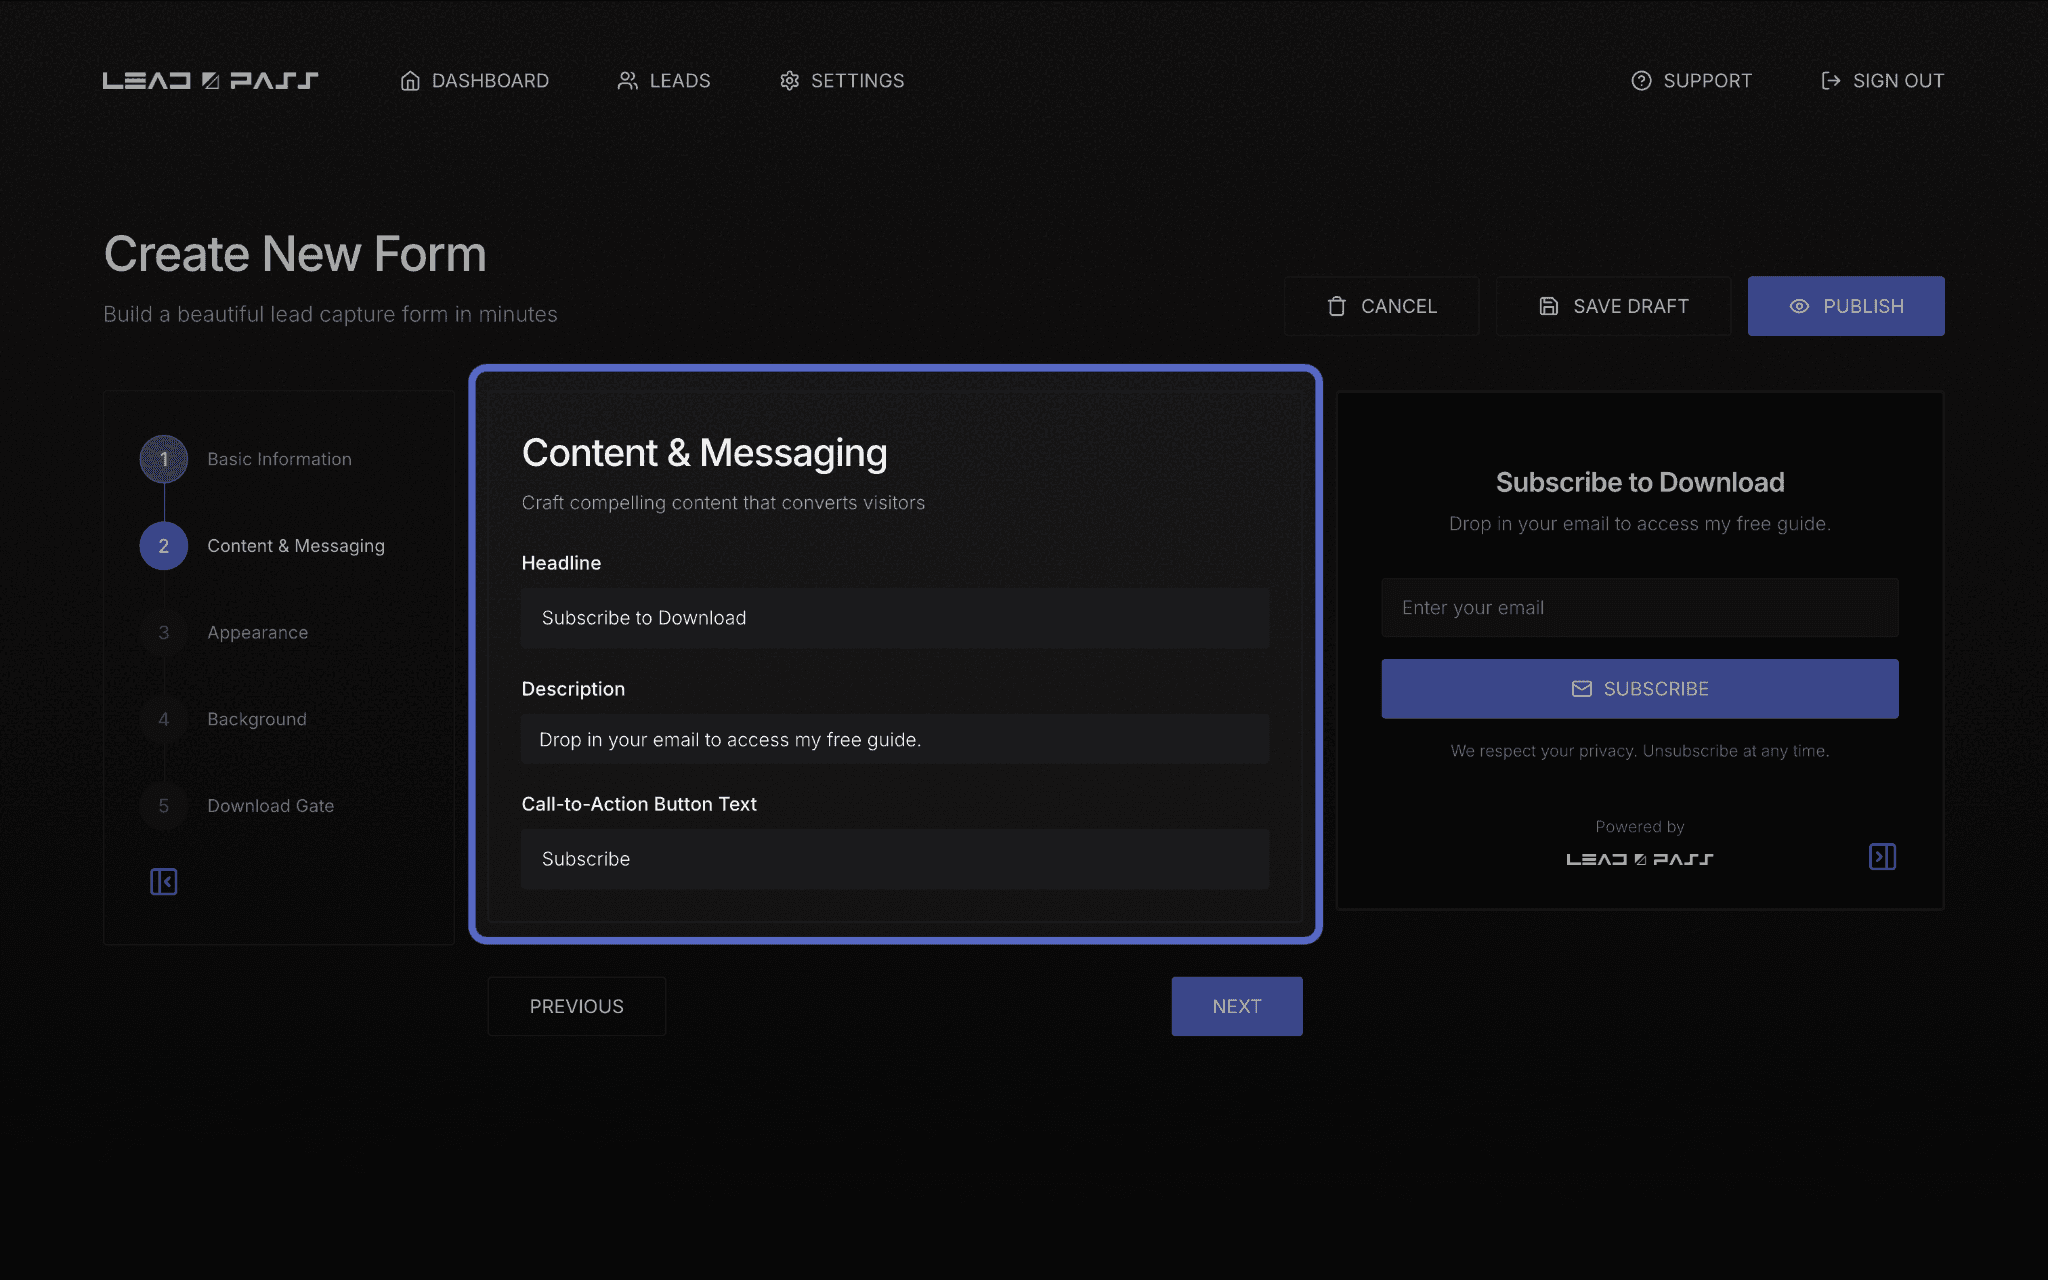
This is the actual sales copy your audience sees on your front-facing form.
Headline — the hook. What's the one thing that makes someone want to sign up?
Description — a sentence or two of supporting detail.
Call-to-Action Button Text — defaults to "Get Access," but you can customize it ("Send Me the Guide," "Count Me In," etc.)
Step 4: Appearance
Add a primary image (optional) and customize how your form's button looks. This is where your form starts to feel like your brand rather than a generic template.
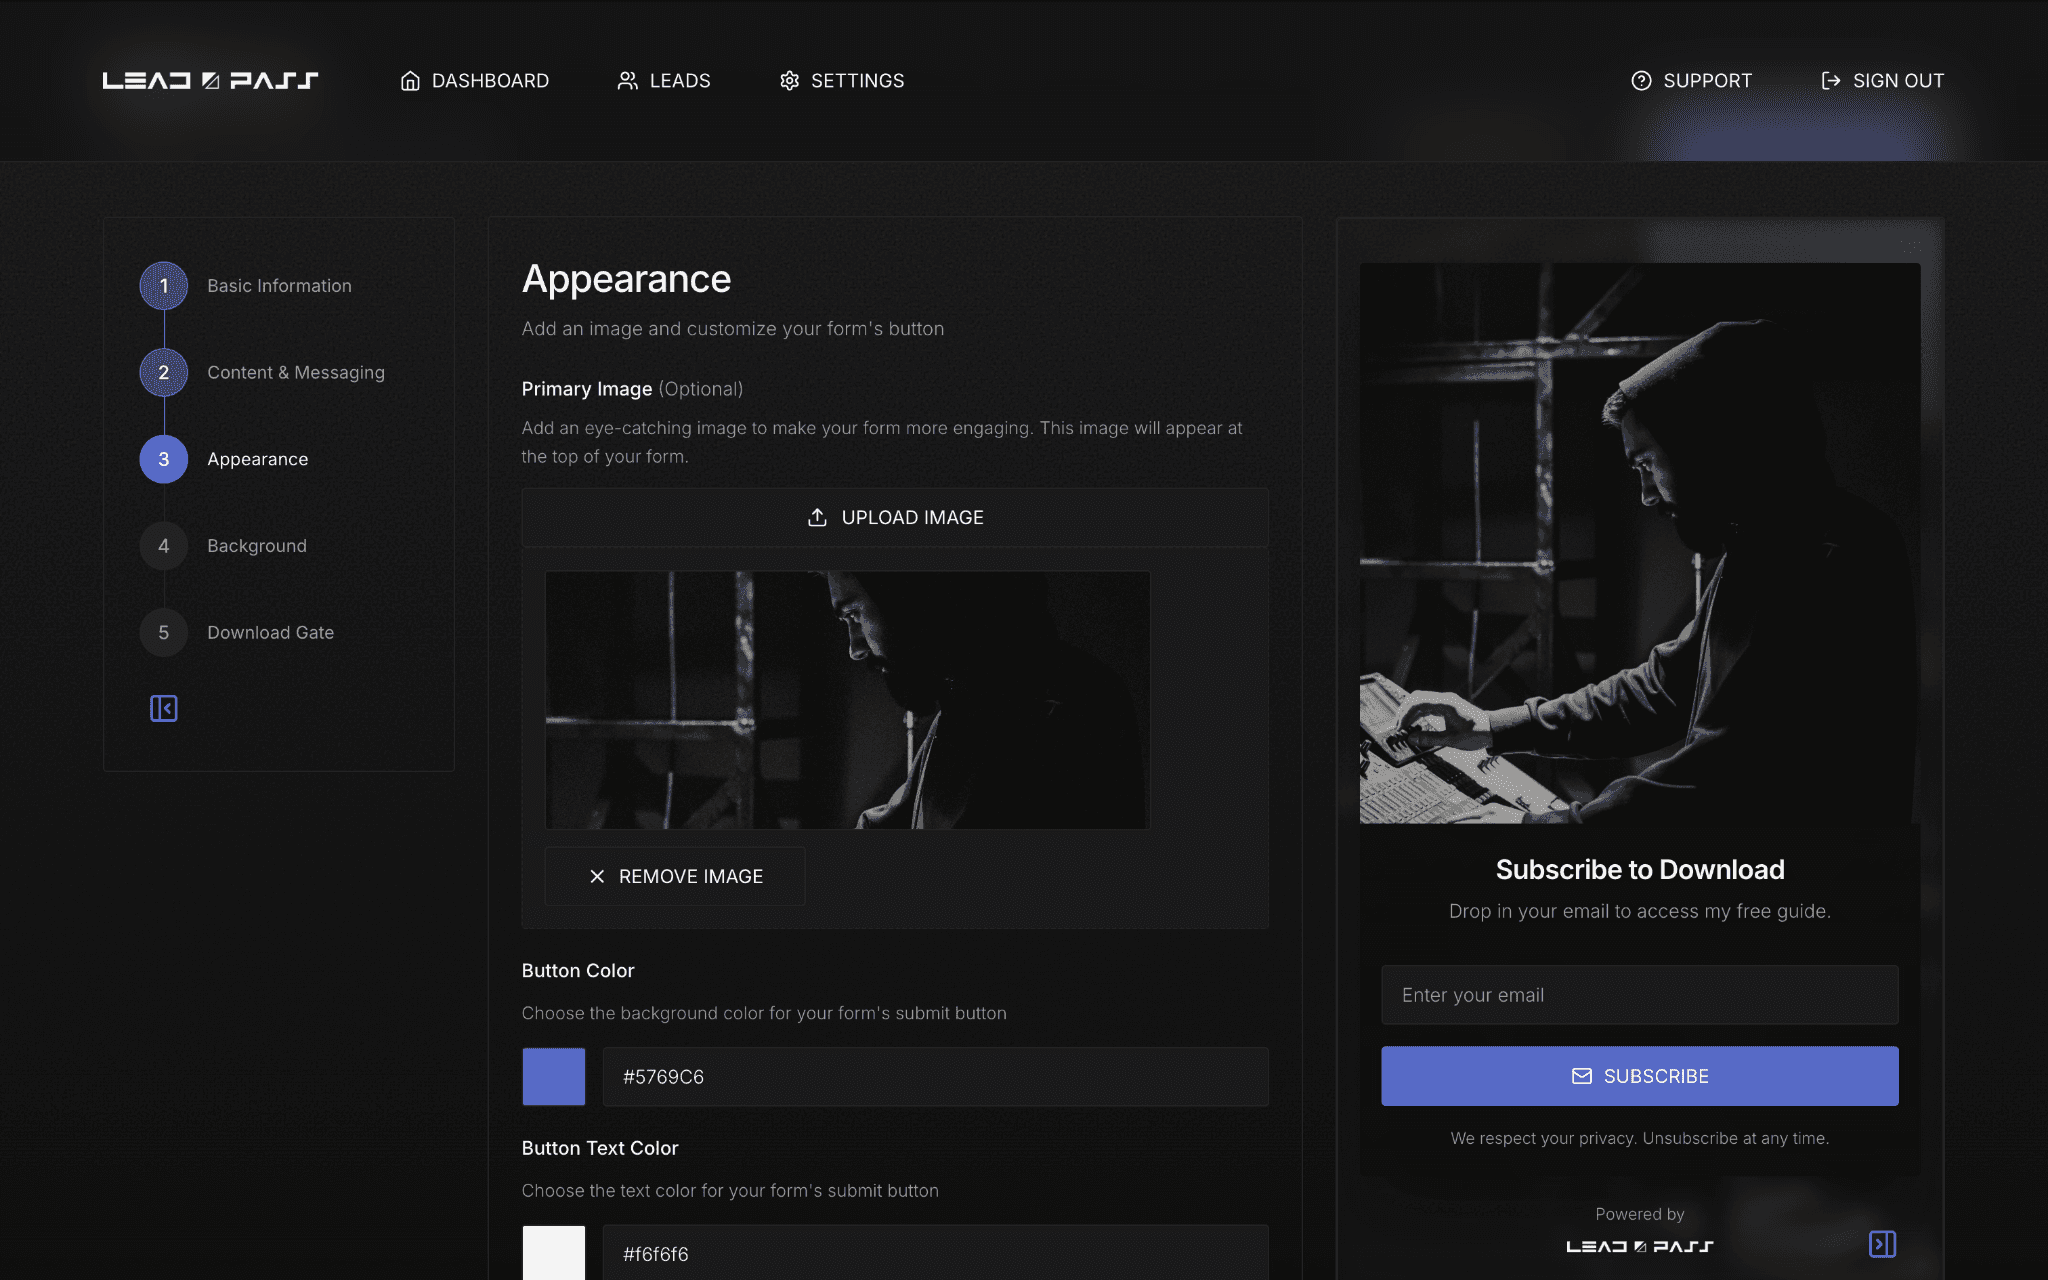
Step 5: Background & Download Gate
The last two settings tie everything together:
Background — sets the visual backdrop behind your form. Choose a solid color, a blurred version of your primary image, or upload a custom background.
Download Gate — this is optional, but it's the core of what makes LeadPass powerful: toggle it on, upload a file, and that file automatically delivers the moment someone submits the form. No manual follow-up required.
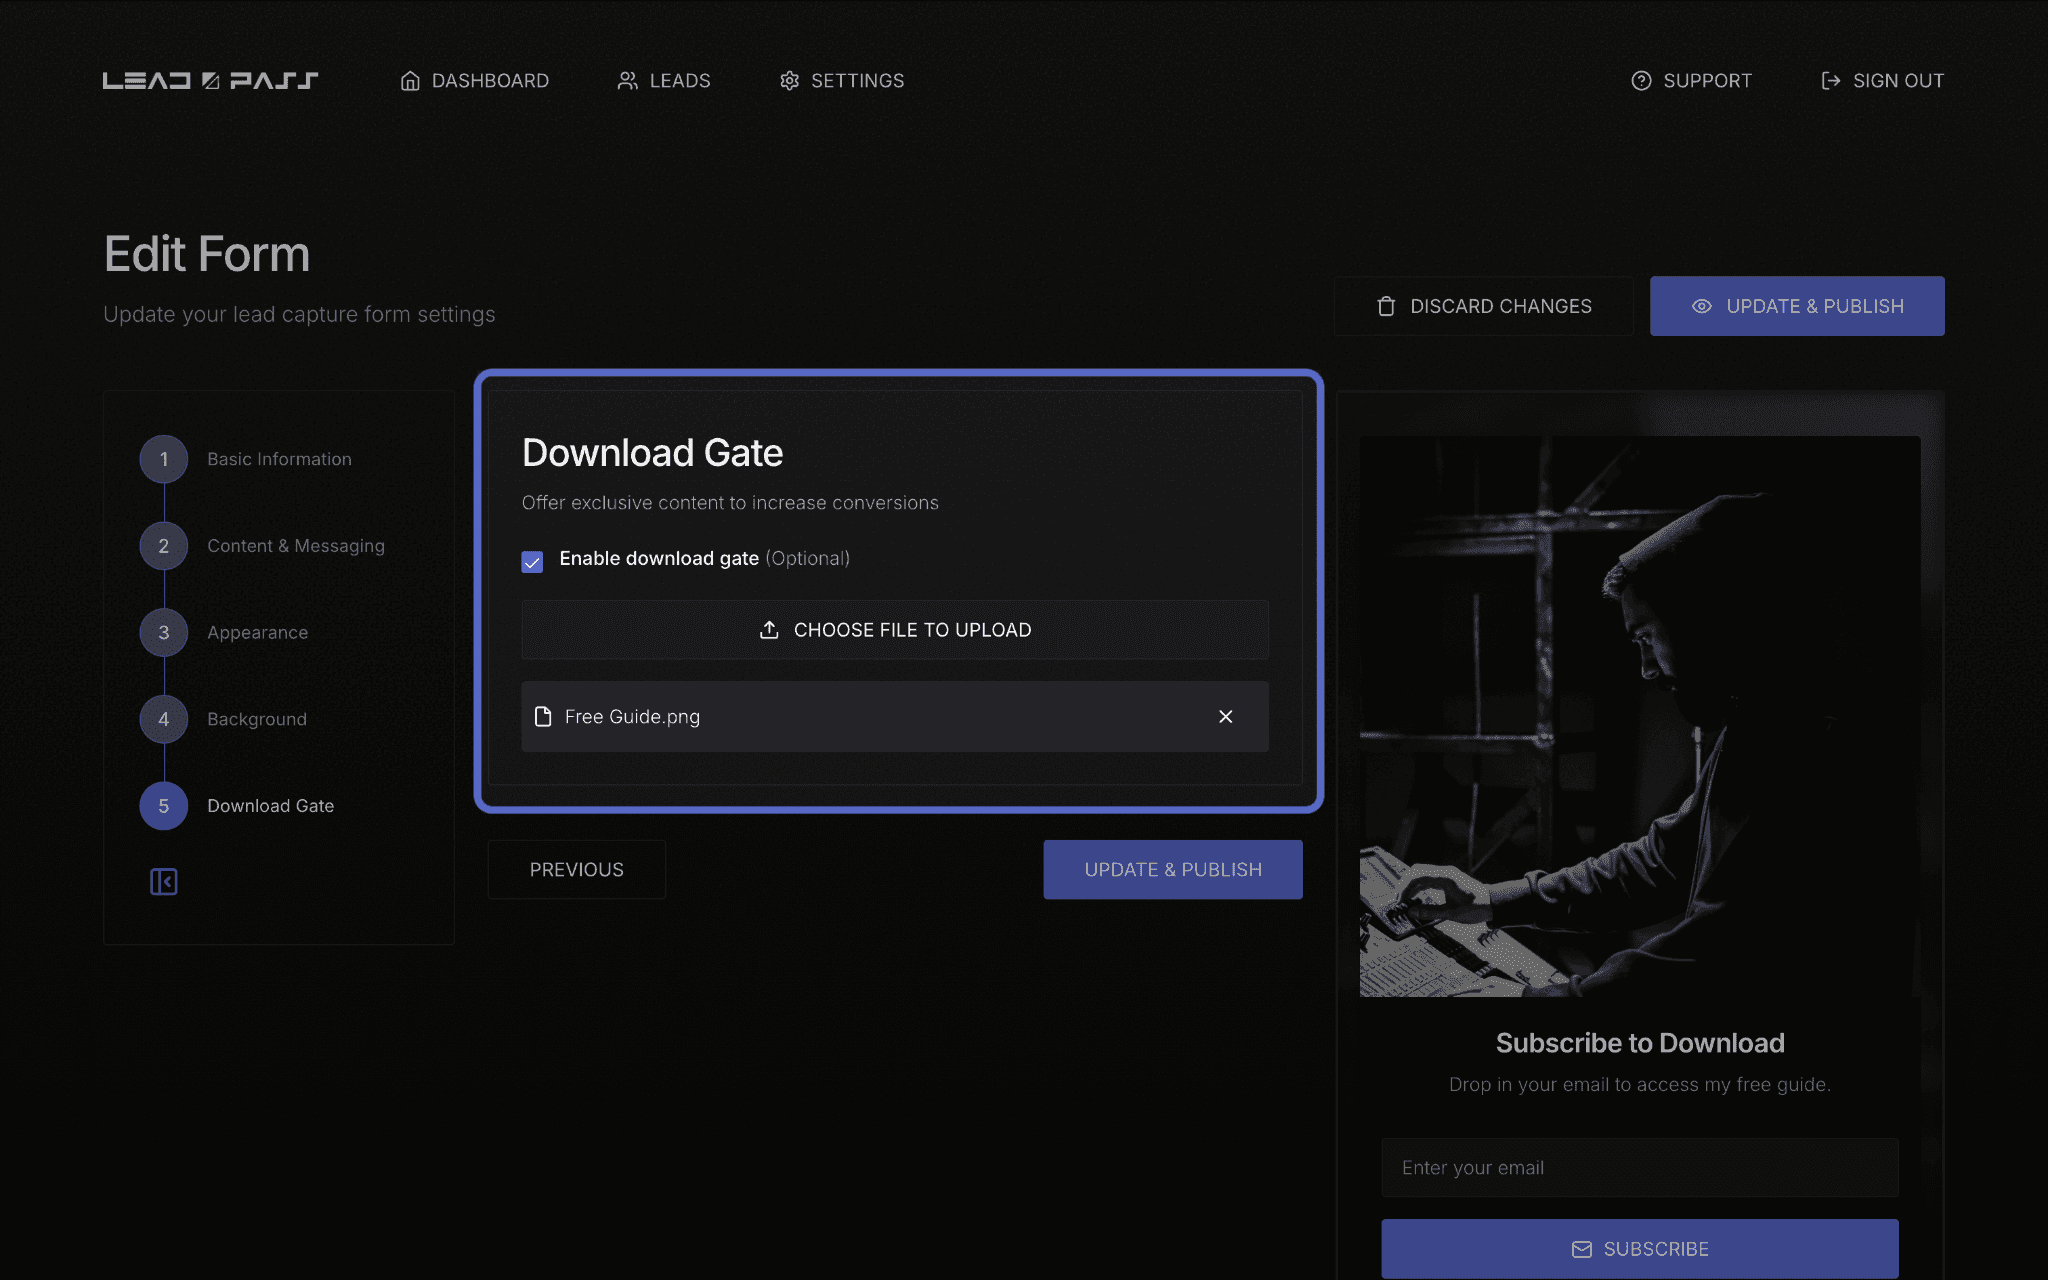
Publishing your form
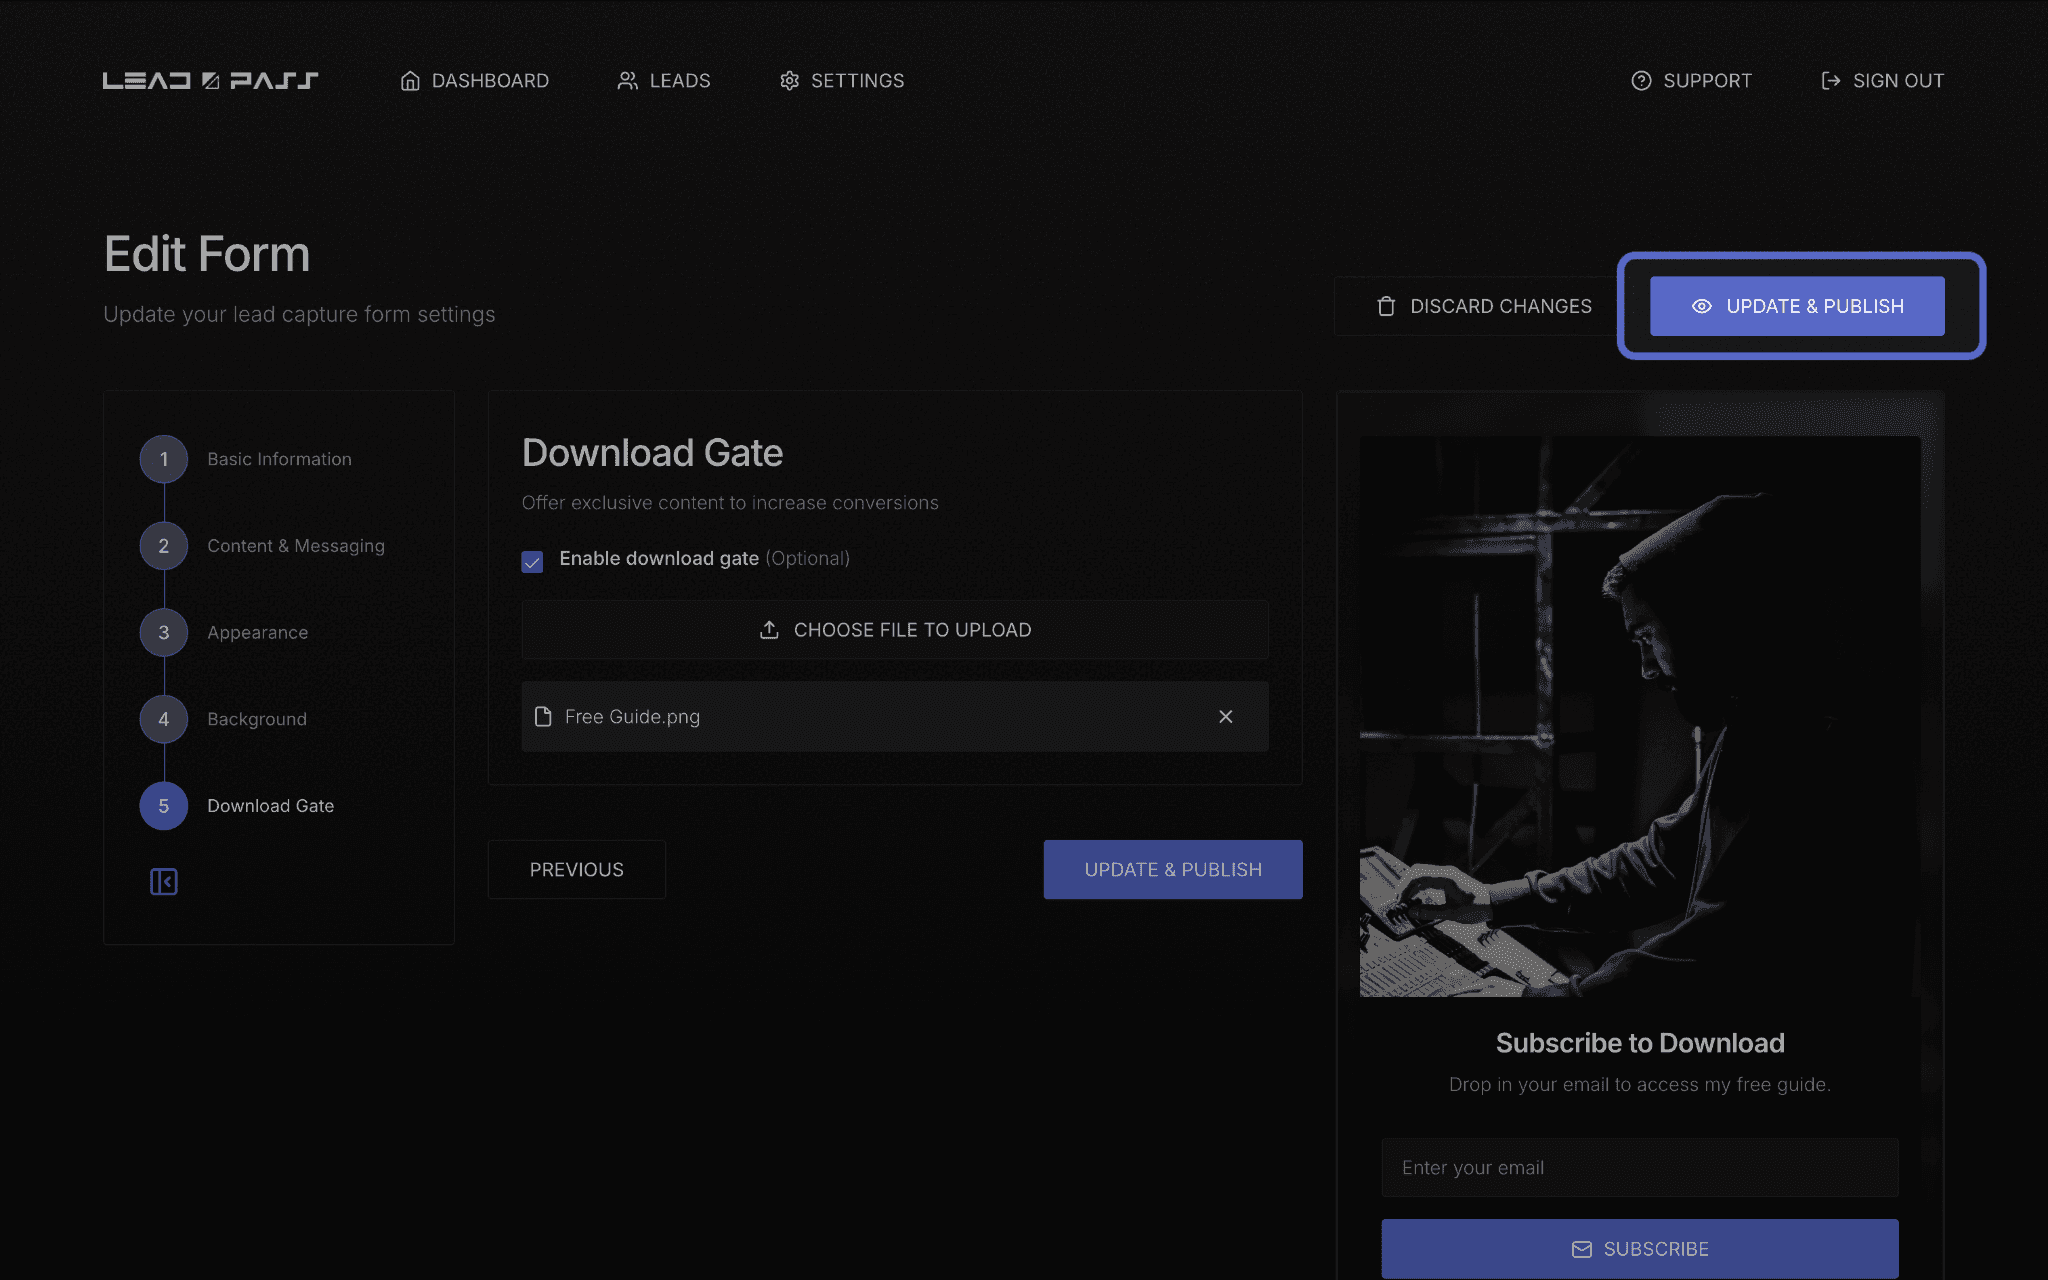
Once you're happy with the preview, click Publish (or Save Draft if you want to come back to it later). Your form is now live at the URL you set in Step 2.
Publishing is the first milestone — the real moment LeadPass starts working for you is your first collected lead. Share your form link, embed it on your site, or add it to a bio link, and keep an eye on your Leads page for that first signup.
What's next
Your form is live, but the goal now is your first lead. Head to Getting your form link to share your form, or Adding a Download Gate for a deeper look at how the Download Gate works once someone signs up.