
Meta Pixel setup and integration
Meta Pixel tracking is a Pro-only feature that lets you track form views and leads directly in Meta Events Manager — useful if you're running Meta ads to generate leads and want to measure how your forms are performing. This guide covers getting it connected. For confirming it's actually working, see Testing your Meta Pixel setup.
Before you start
You'll need:
A Pro plan subscription (Meta Pixel tracking isn't available on Free — see Free vs. Pro: What's included)
Access to your Meta Business Manager account
Your Pixel ID
If you haven't created a Meta Pixel yet, do that first in Meta Events Manager before coming back here.
Finding your Pixel ID
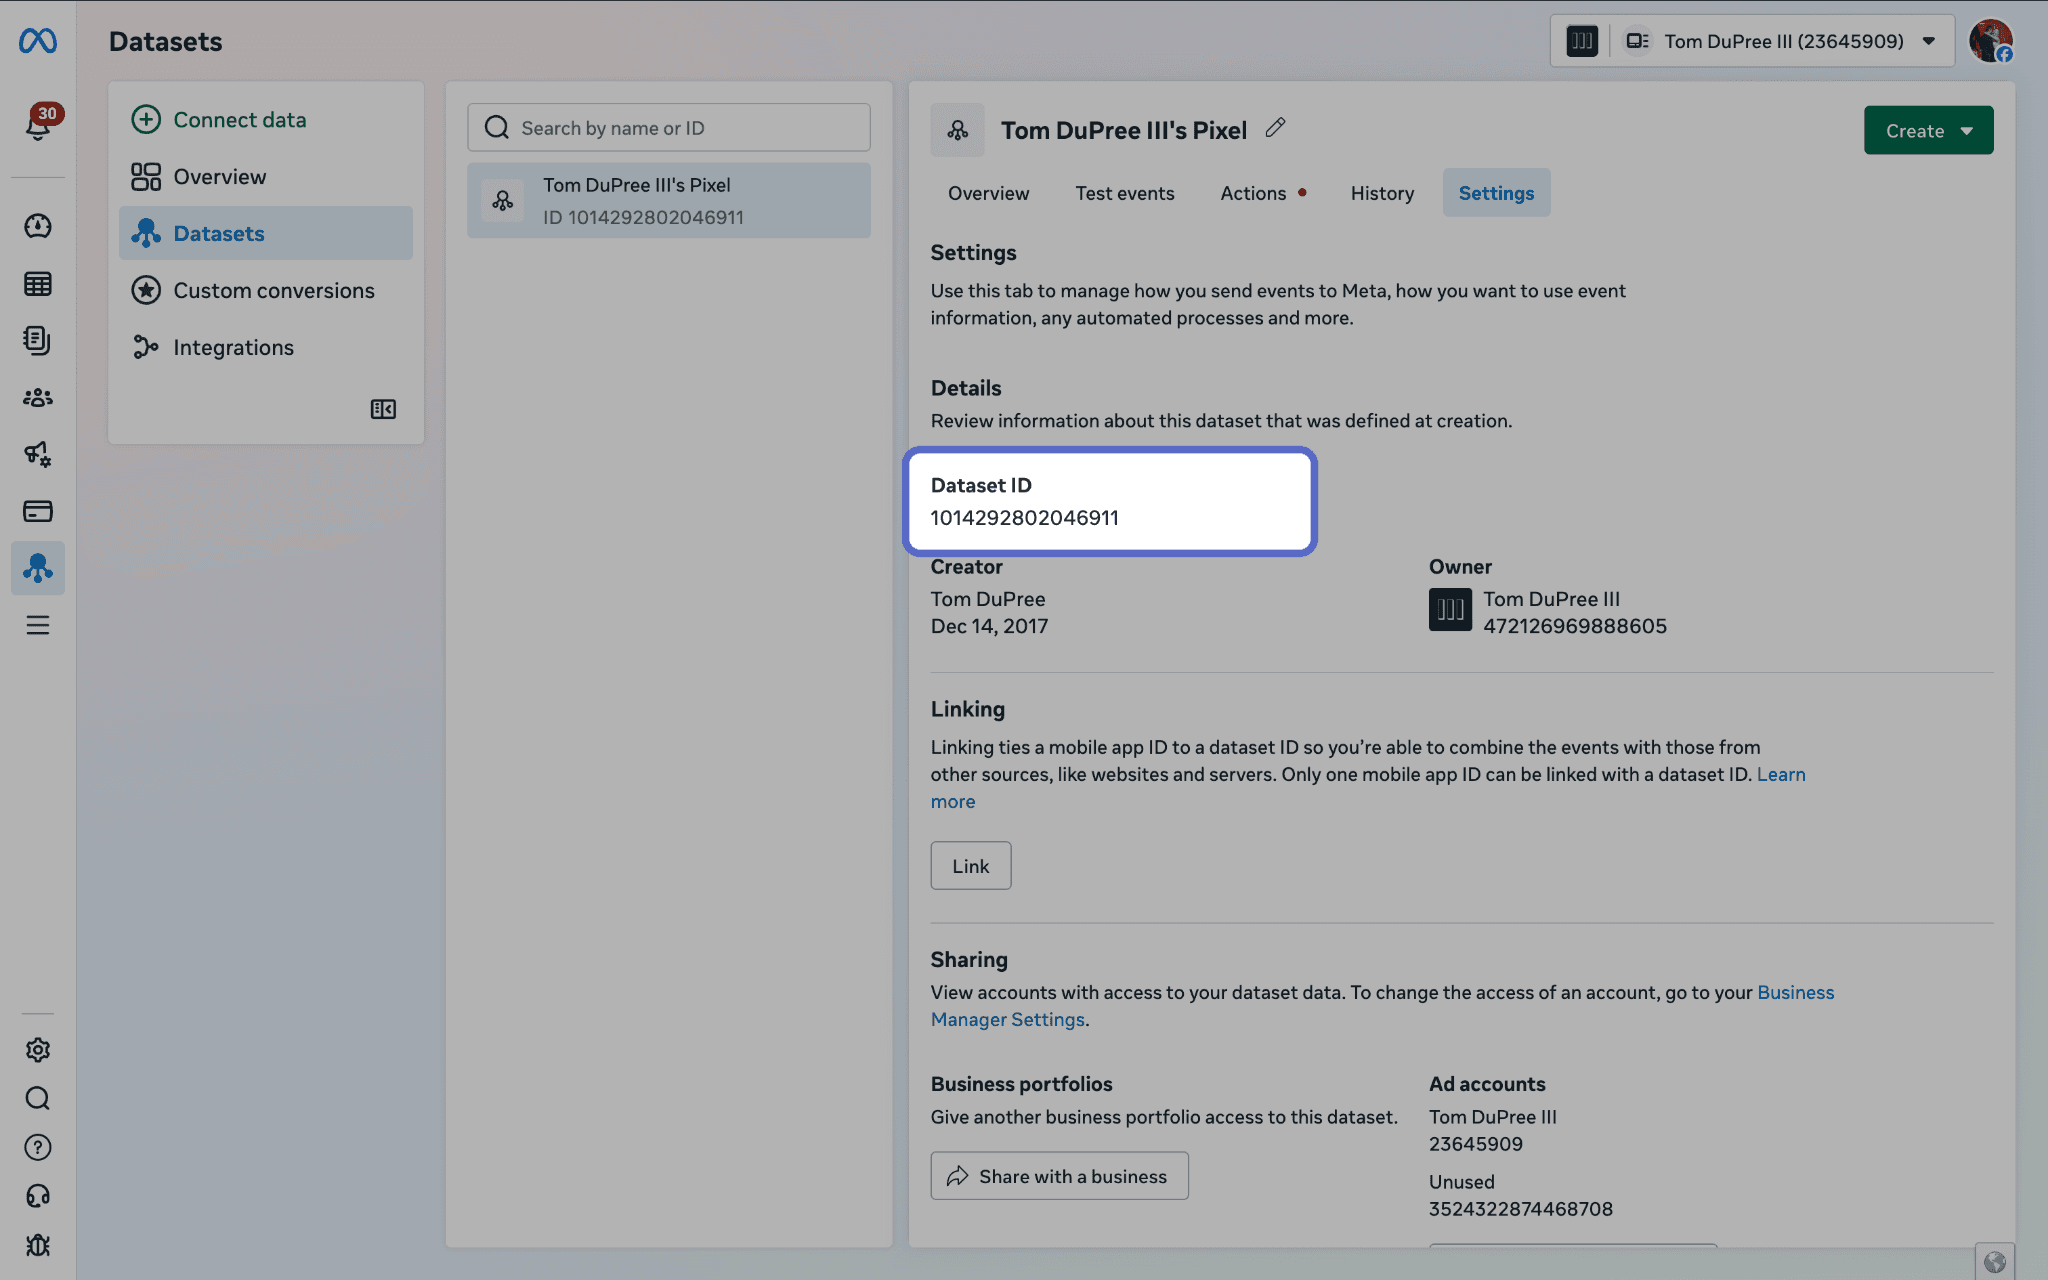
Your Pixel ID lives in Meta Business Manager → Events Manager. Once you're in the Events Manager, select your pixel, then navigate to Settings and copy your Pixel ID to your clipboard.
Entering your Pixel ID in LeadPass
Go to Settings → Meta Pixel
Paste your Pixel ID into the Pixel ID field
Click Save Settings
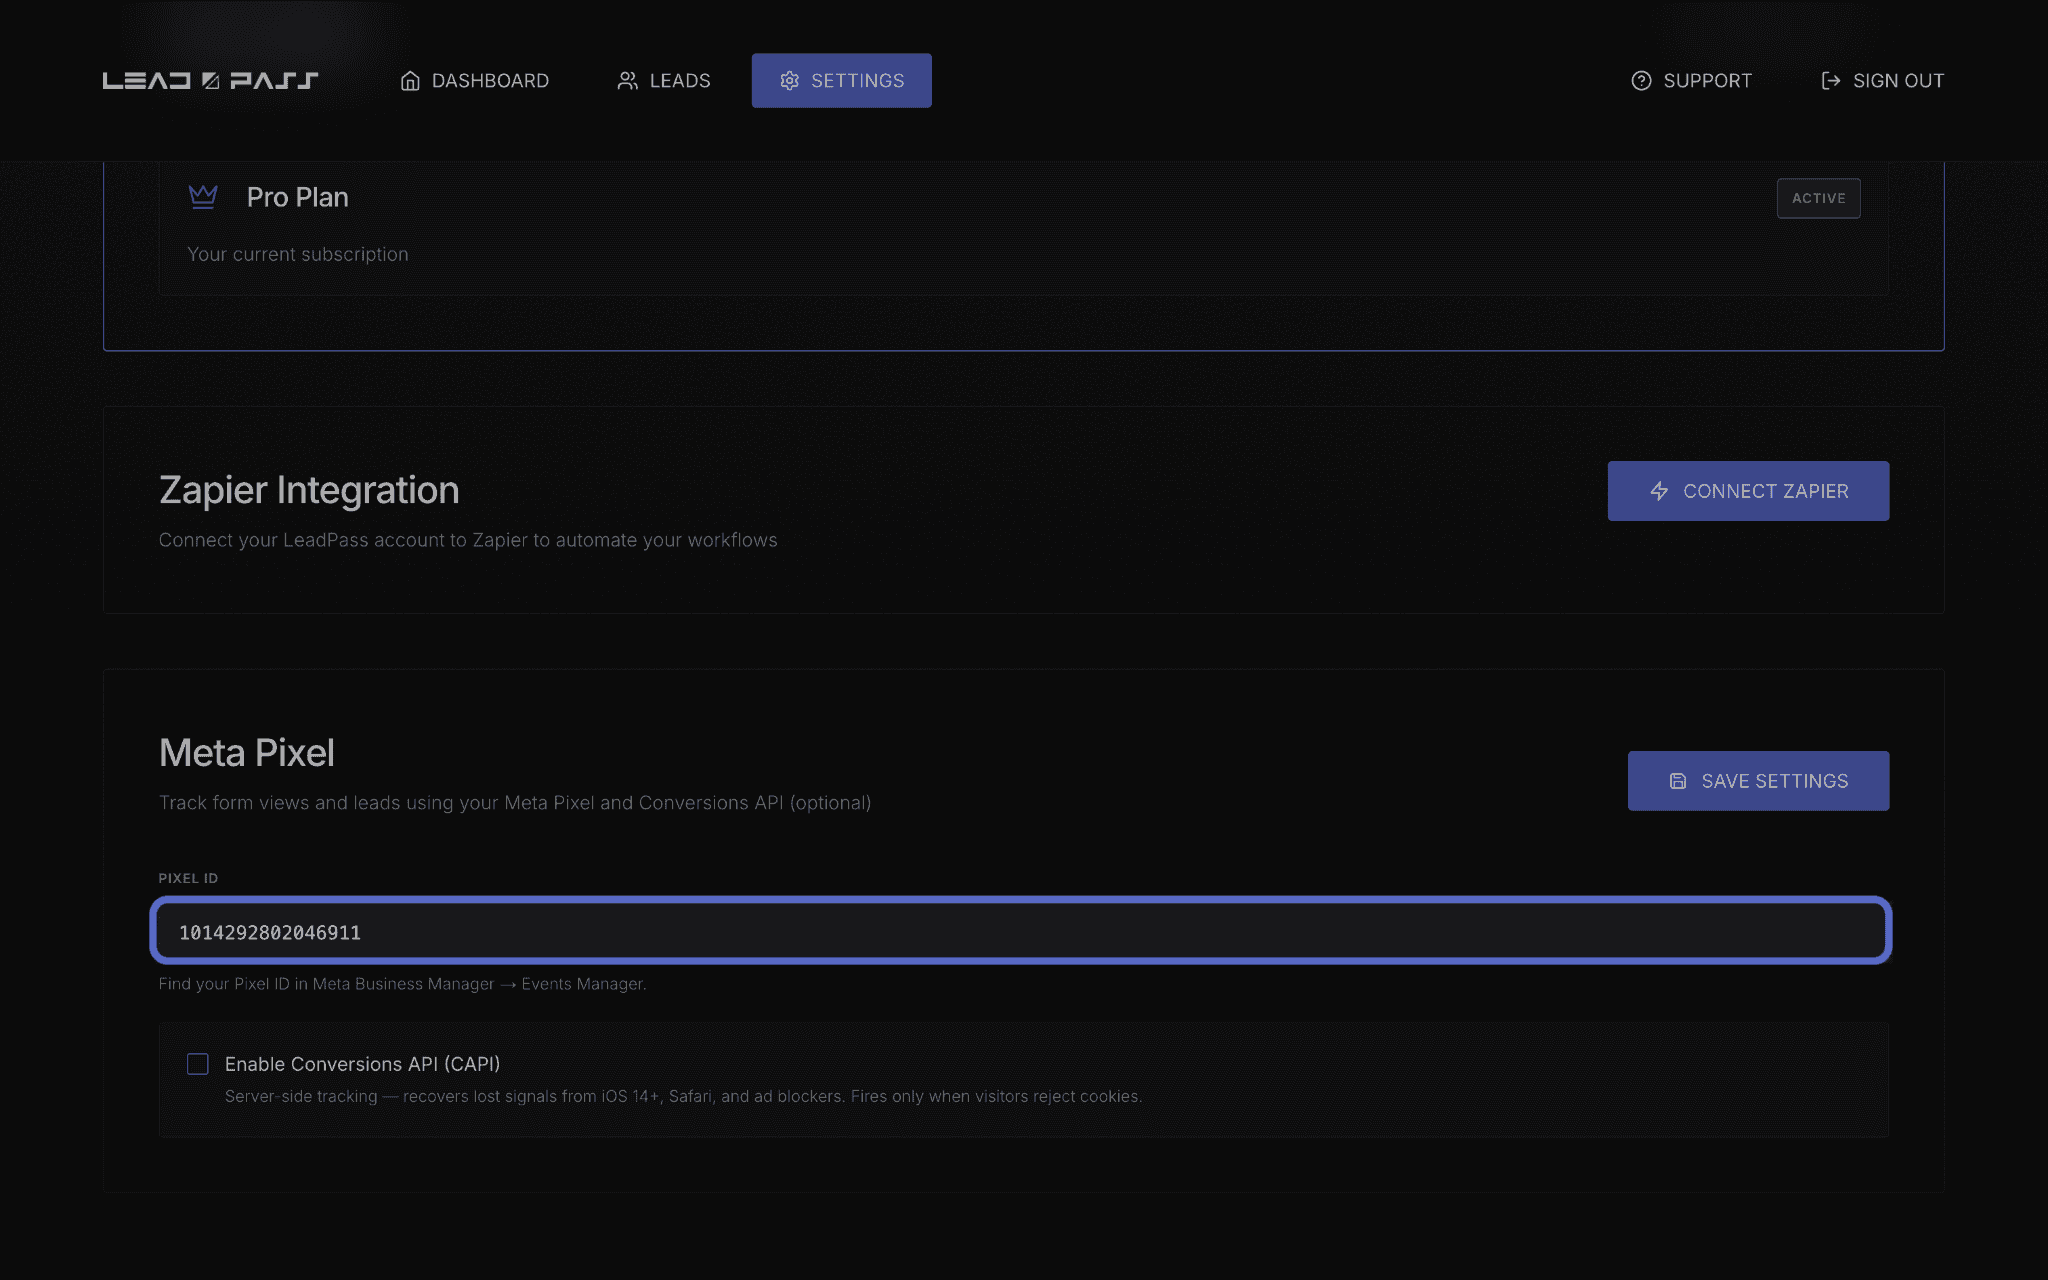
At this point, basic pixel tracking is live. The next section is optional but recommended.
Enabling Conversions API (CAPI)
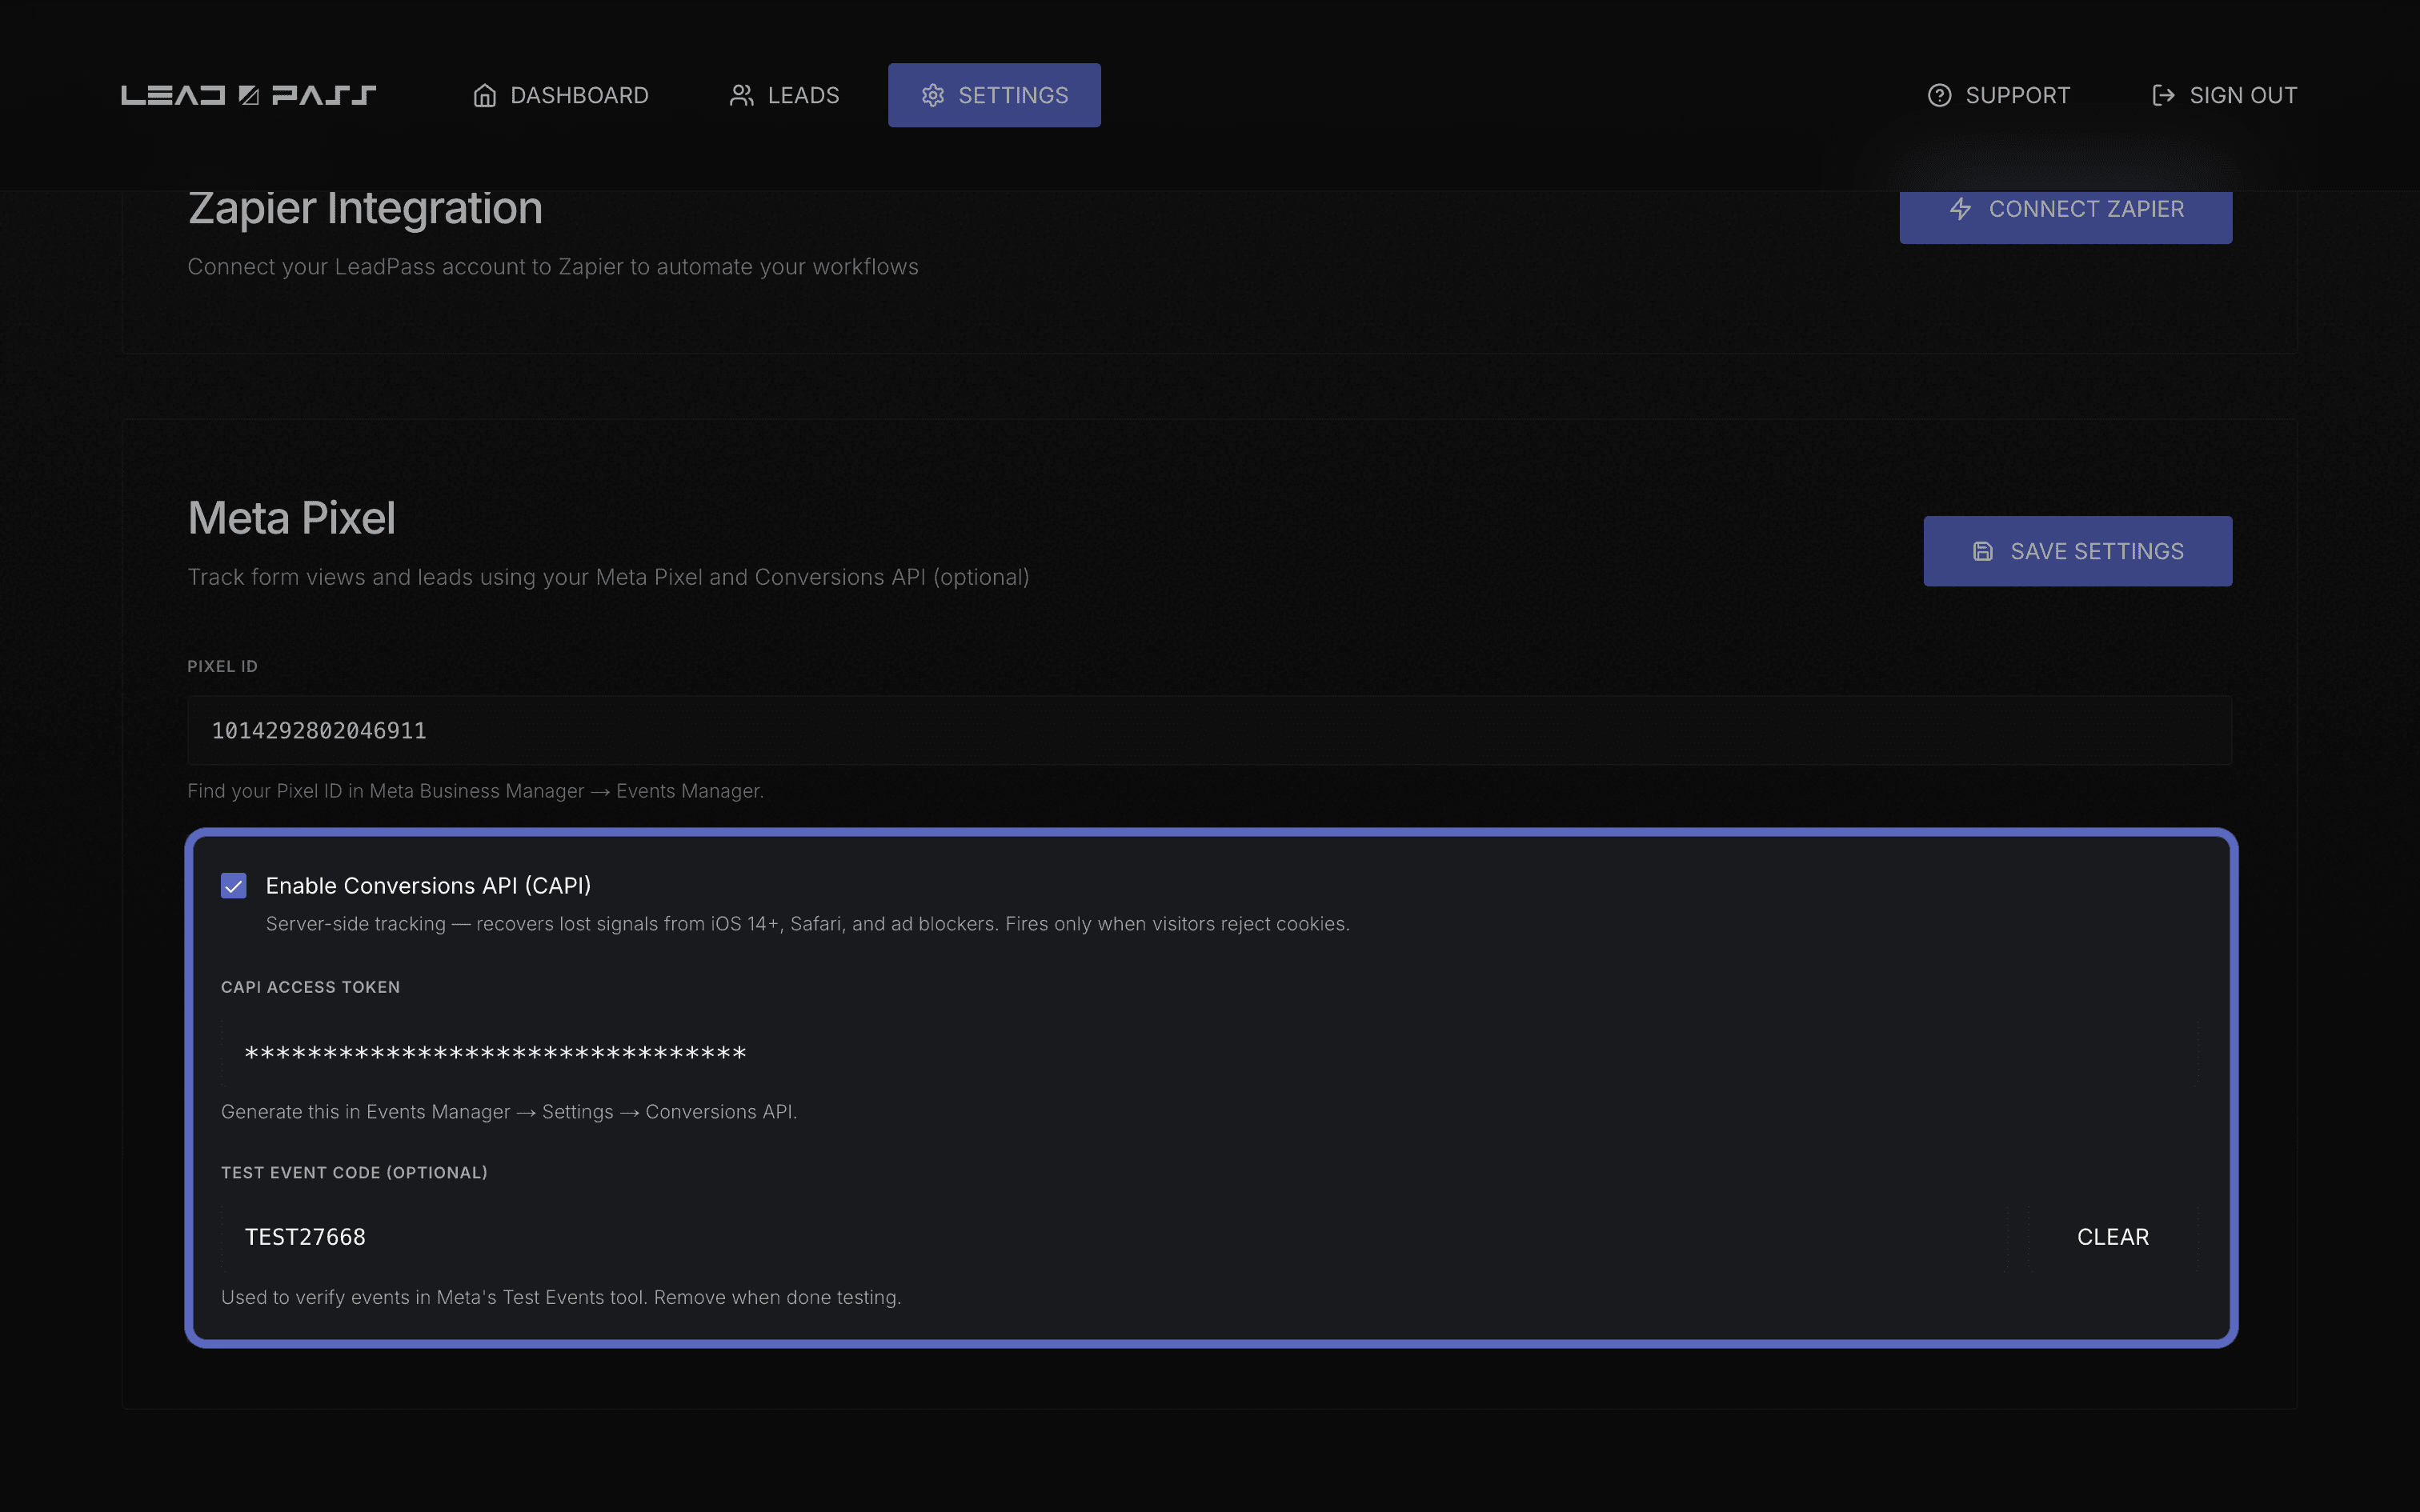
Below the Pixel ID field is an option to Enable Conversions API (CAPI). This is worth turning on: CAPI is server-side tracking that recovers lost signals from iOS 14+, Safari, and ad blockers — sources of traffic that browser-based pixel tracking alone tends to miss. It only fires when a visitor has rejected cookies, so it works alongside your existing pixel rather than duplicating it.
To enable it:
Check Enable Conversions API (CAPI)
Paste your CAPI access token — generate this in Events Manager → Settings → Conversions API
Click Save Settings
What's next
Once your Pixel ID (and optionally CAPI) is saved, head to Testing your Meta Pixel setup to confirm everything is actually firing correctly before you rely on it for your ad campaigns.