
Testing your Meta Pixel setup
Before you trust your Meta Pixel data for real ad decisions, it's a smart move to confirm it's working correctly. This guide covers two testing paths — pick the one that matches your setup. If you haven't connected your pixel yet, start with Meta Pixel setup and integration first.
Browser installation only (no Conversions API) — use this if you enabled just the Pixel ID and didn't turn on CAPI.
CAPI (Conversions API) — use this if you also enabled and configured Conversions API.
If you're not sure which applies, check Settings → Meta Pixel — if Enable Conversions API (CAPI) is unchecked, you're on browser-only.
Testing browser-only installation (no CAPI)
If you haven't set up CAPI, your pixel is relying entirely on browser-side tracking. The easiest way to confirm it's firing is Meta's free Meta Pixel Helper browser extension.
Install the Meta Pixel Helper extension for Chrome from the Chrome Web Store
Open one of your published LeadPass forms in a new tab
Click the Meta Pixel Helper icon in your browser toolbar
If your pixel is installed correctly, the extension icon will show a number badge and, when clicked, list the pixel ID it detected along with the events firing on that page. When first loading the page, you should see a PageView event.
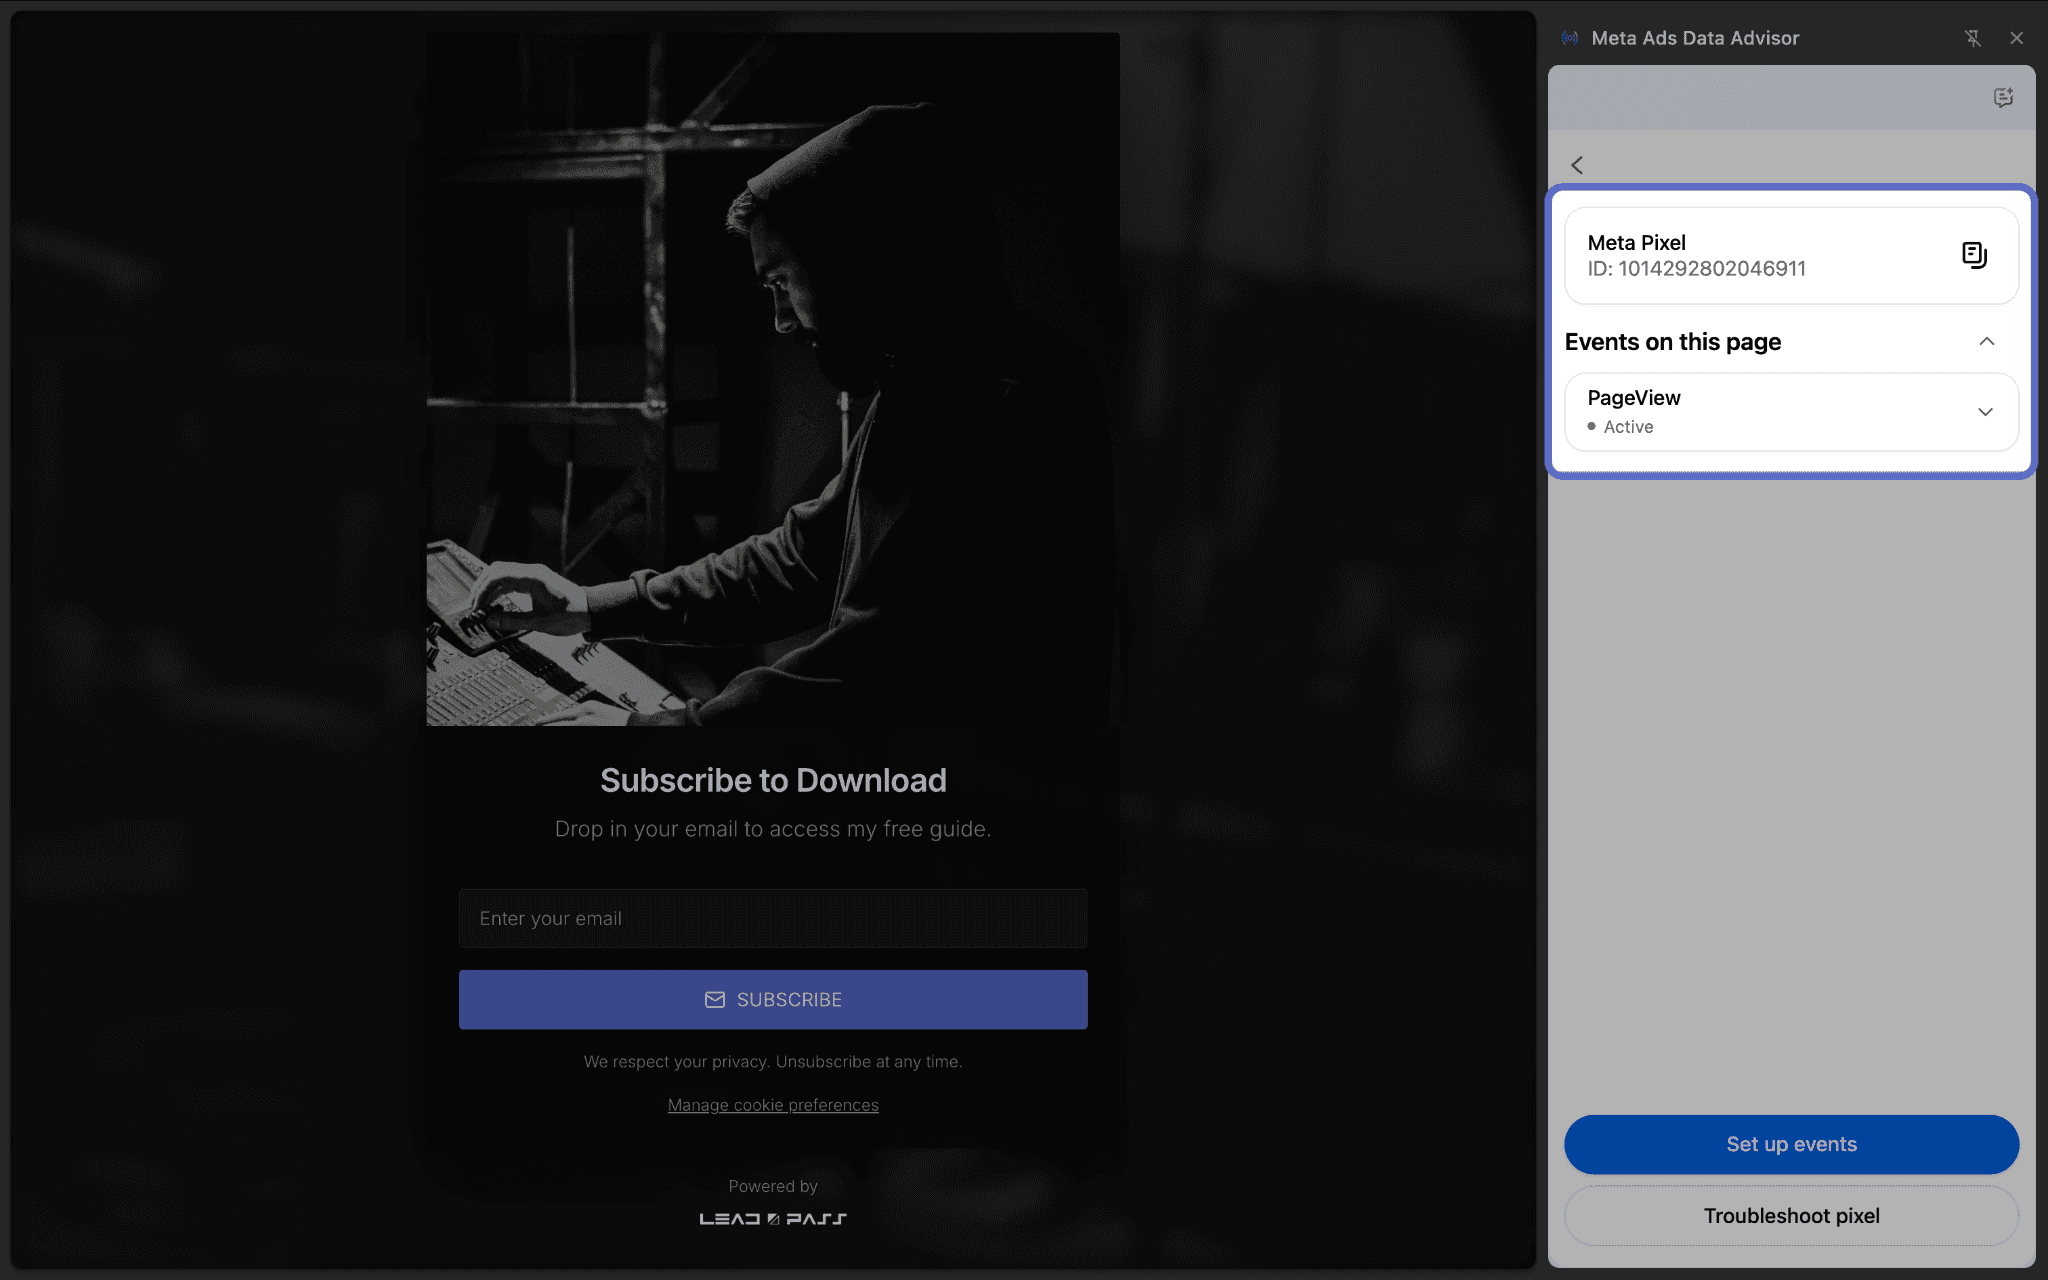
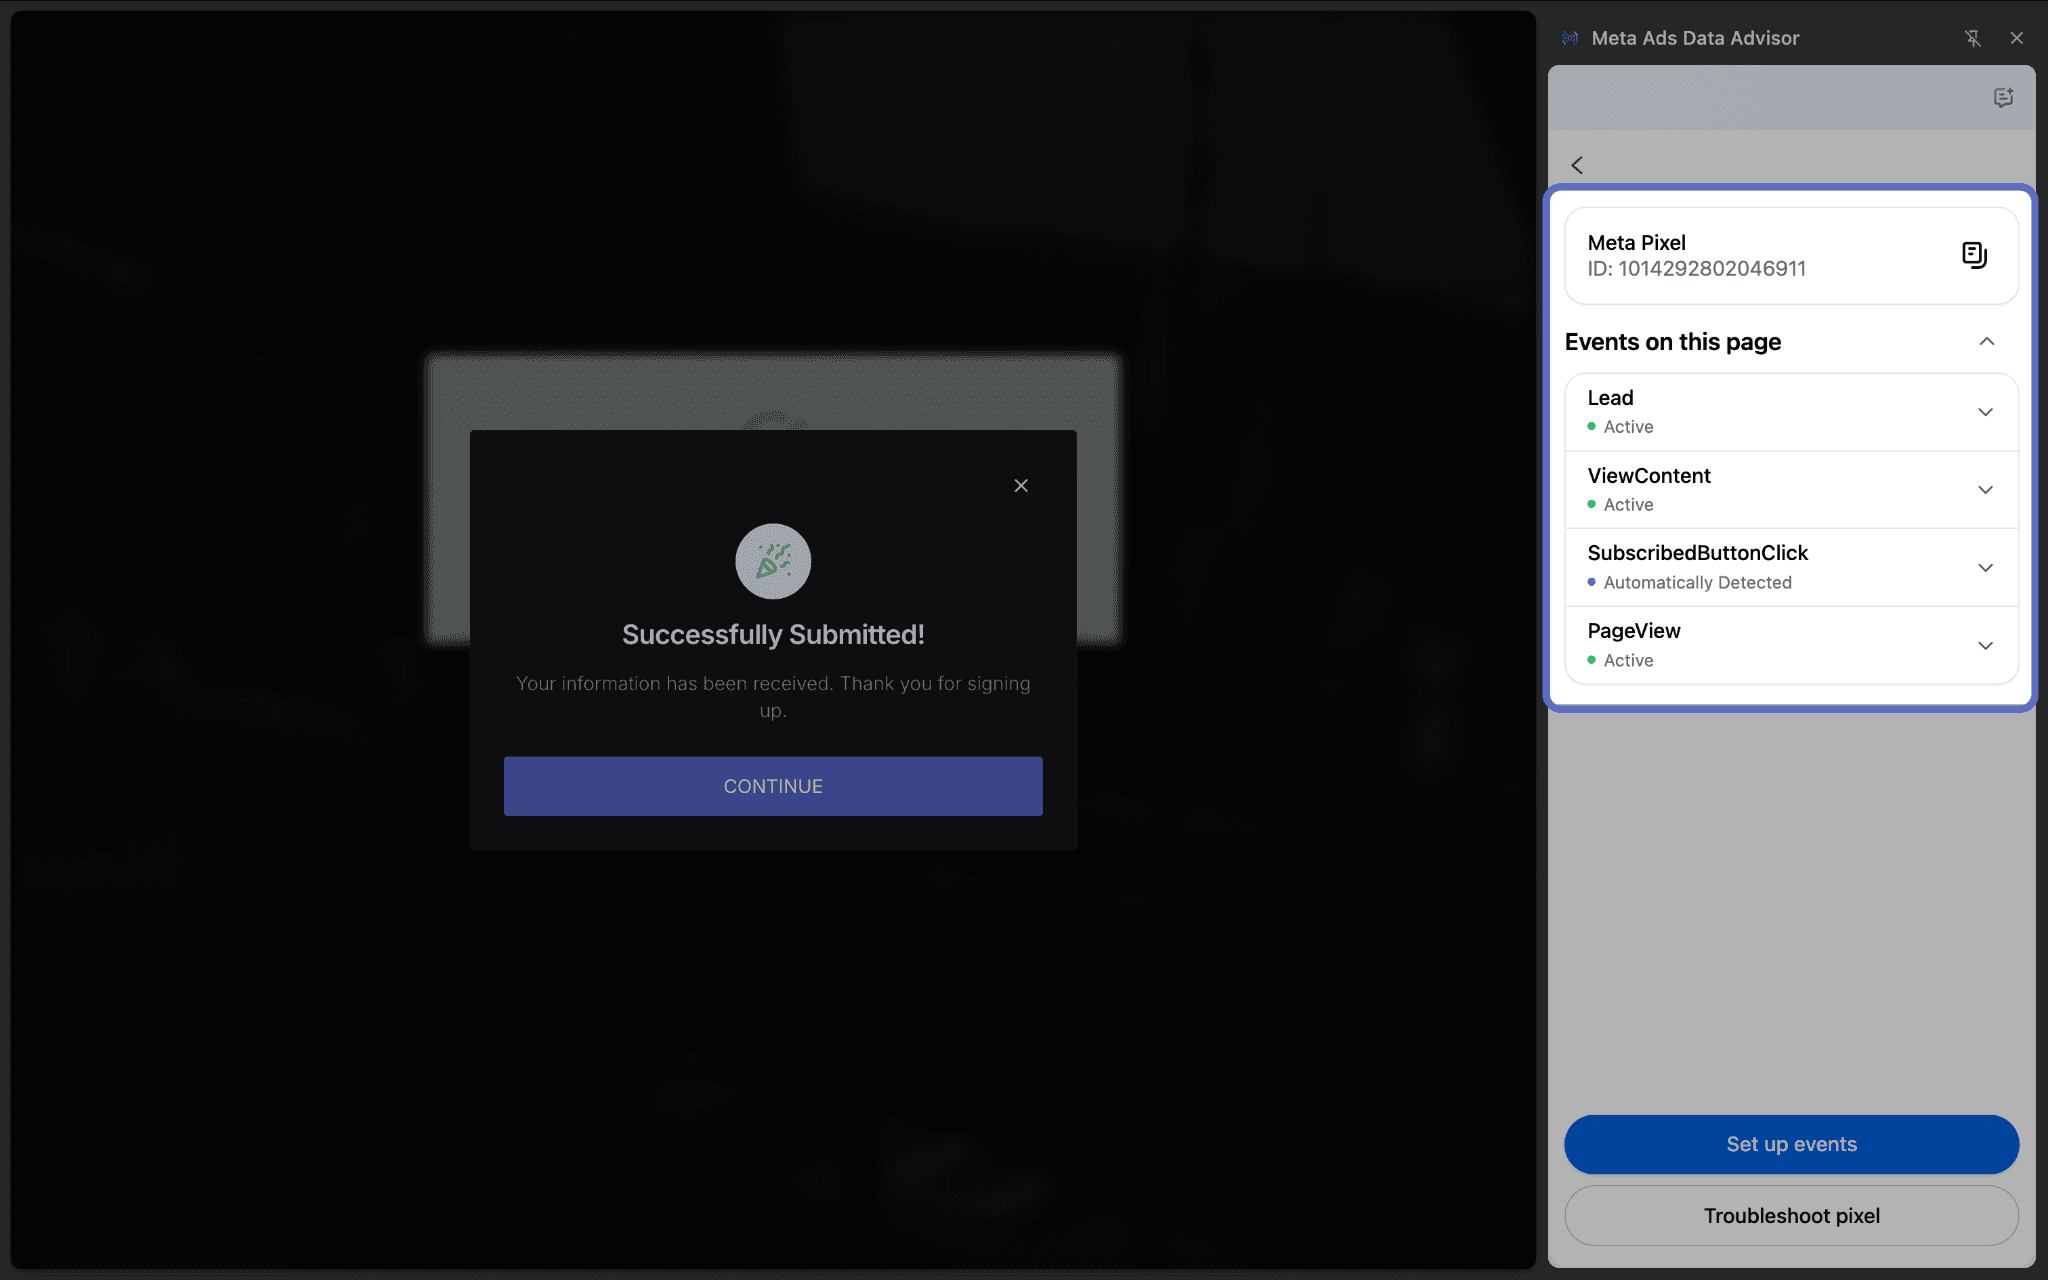
To confirm lead-capture tracking specifically, submit the form once with a test entry with the Pixel Helper open — you should see an additional Lead event logged at that point.
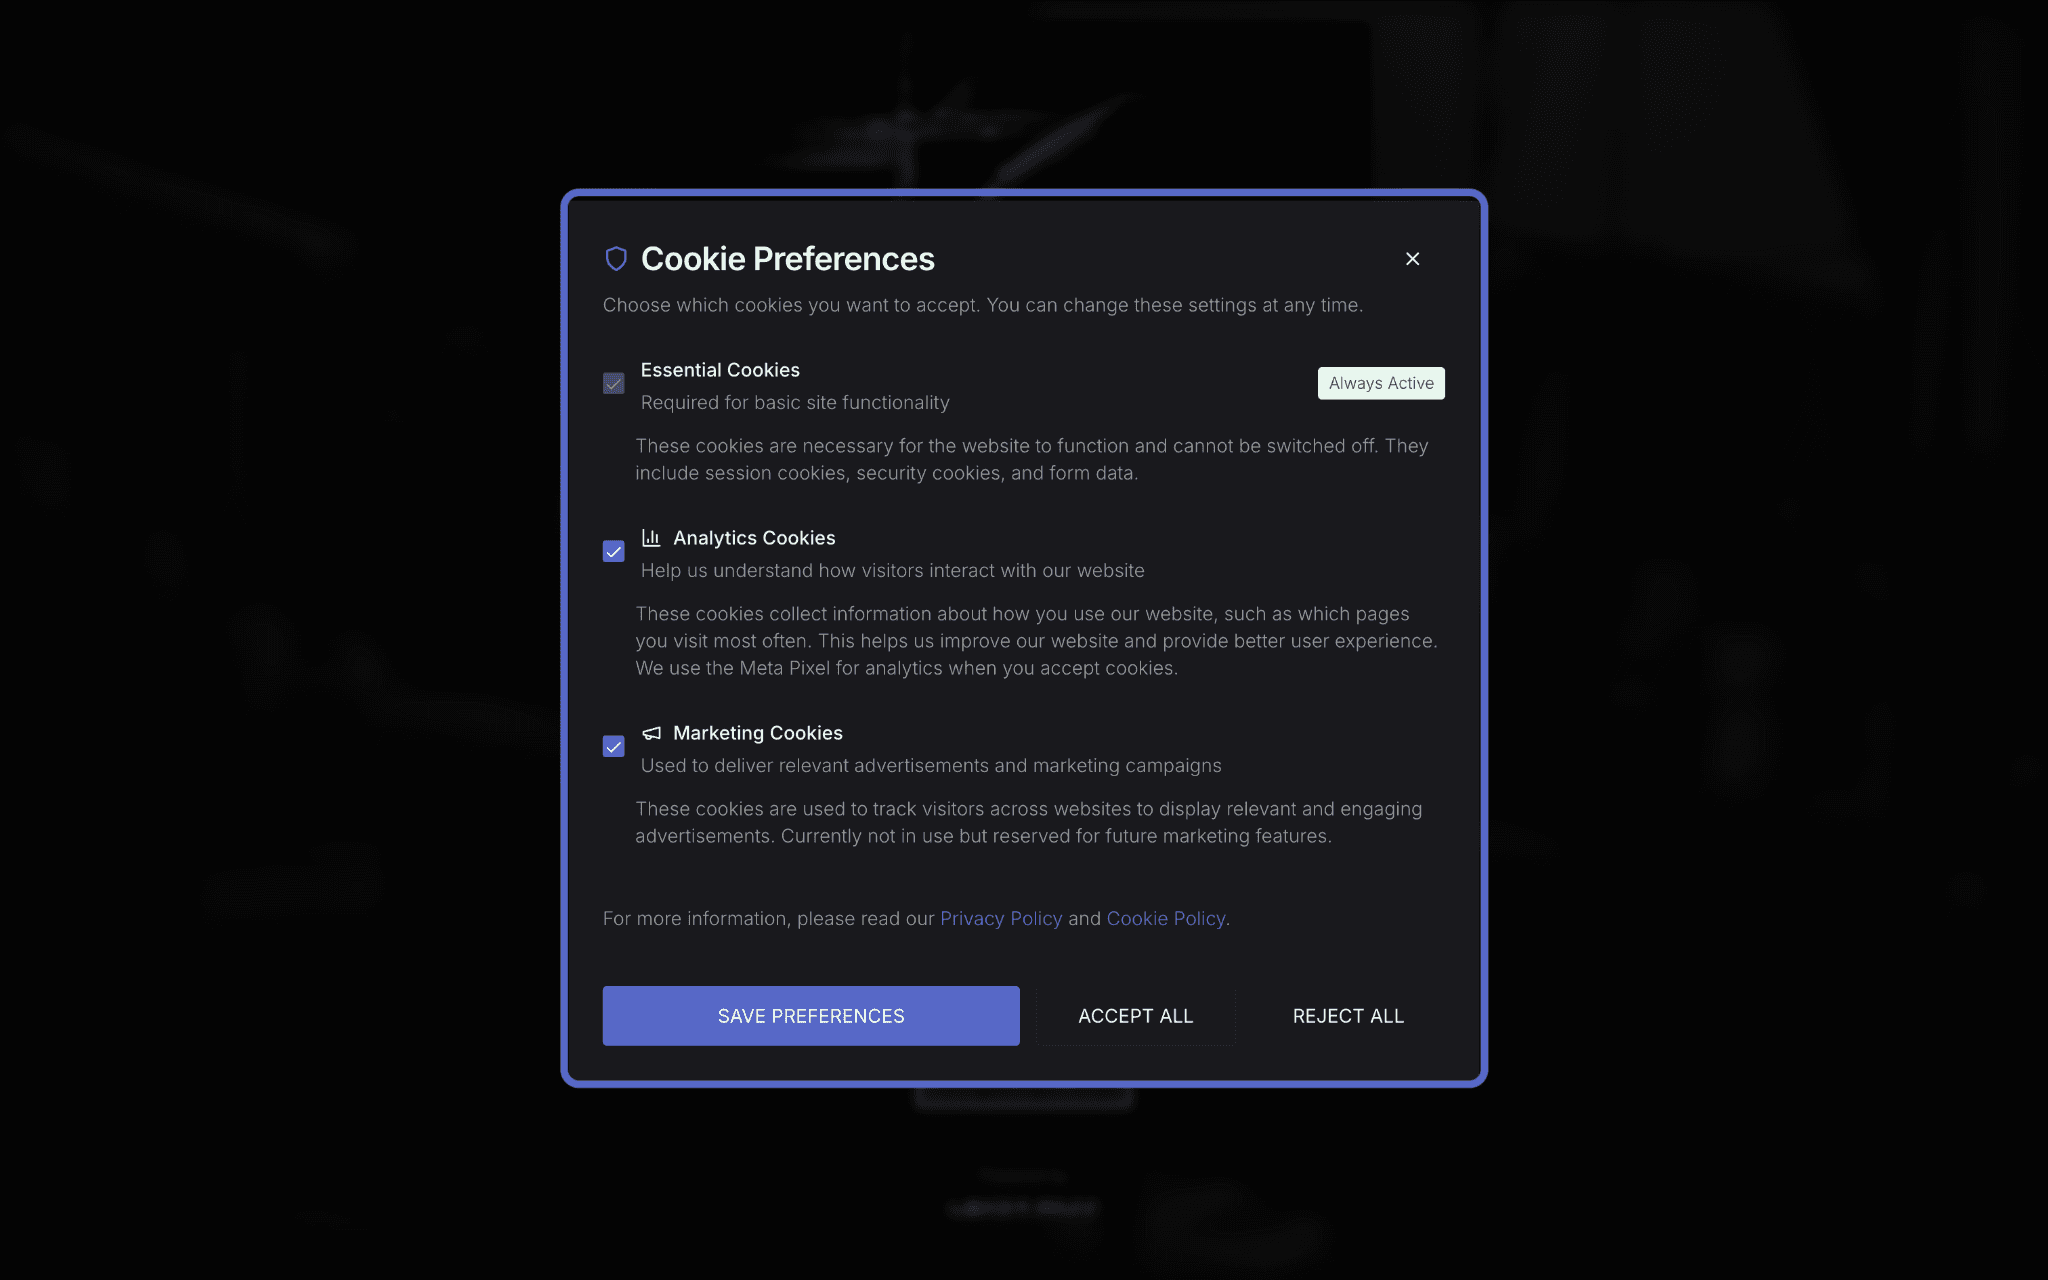
If the extension shows no pixel detected at all, double-check your Pixel ID is entered correctly under Settings → Meta Pixel and that you clicked Save Settings after entering it. If your ID is correct, confirm you have accepted cookies for your LeadPass forms by selecting Manage cookie preferences at the bottom of your form and selecting Accept All.
Testing with Conversions API (CAPI)
The steps below use Meta's Test Events tool together with LeadPass's built-in test event code field. This path applies if you've enabled CAPI, though the Test Events tool can also be used to verify browser-only events landing in Meta's dashboard if you'd like that extra layer of confirmation.
Getting your test event code
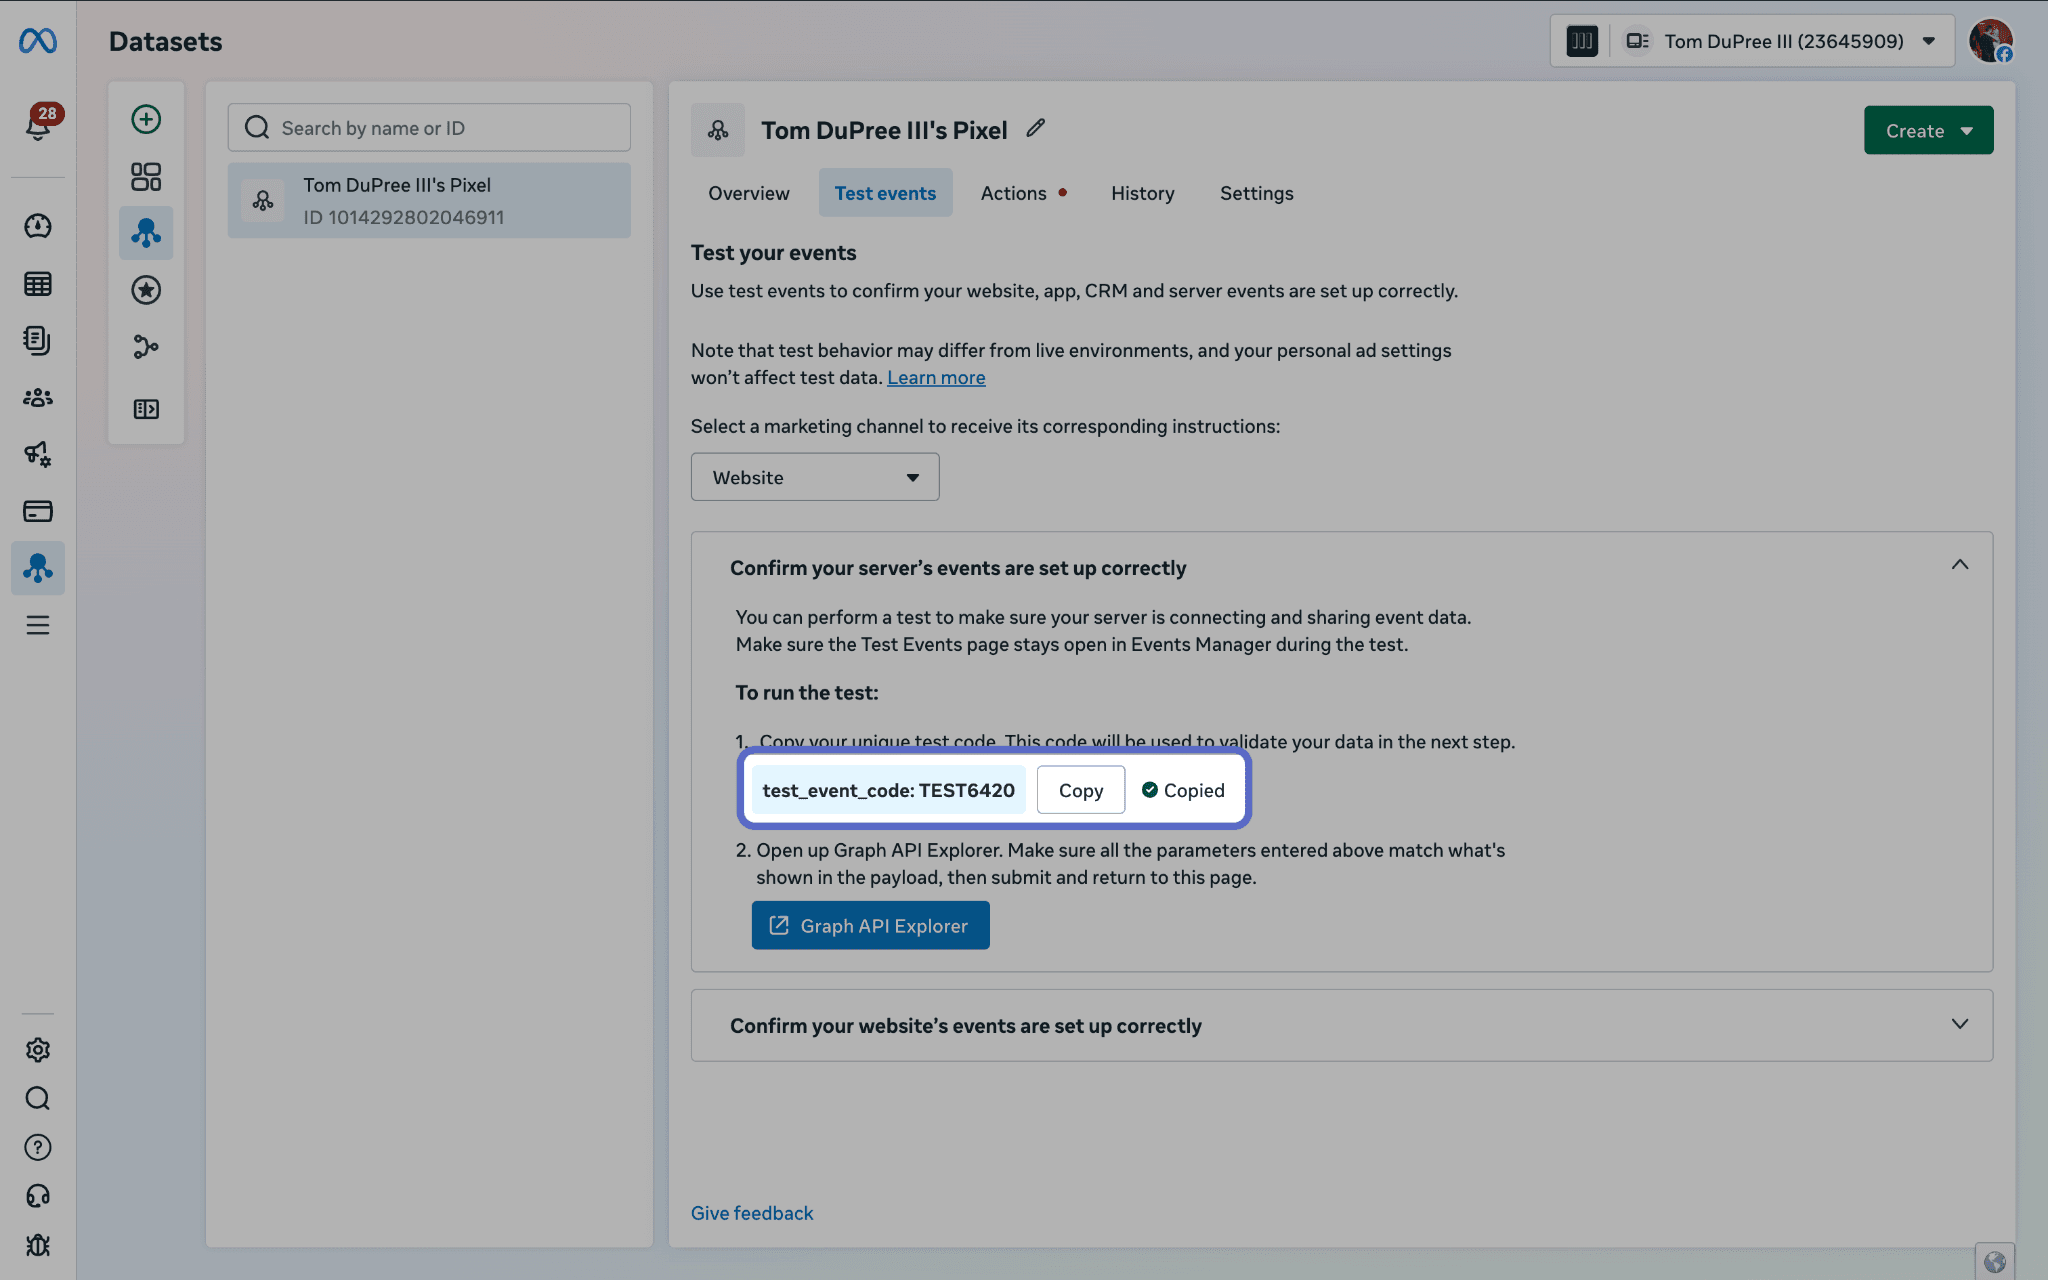
In Meta Events Manager, open the Test Events tab for your pixel, then select Website, then Confirm your server's events are set up correctly. Meta will generate a test event code there — copy it.
Adding your test event code in LeadPass
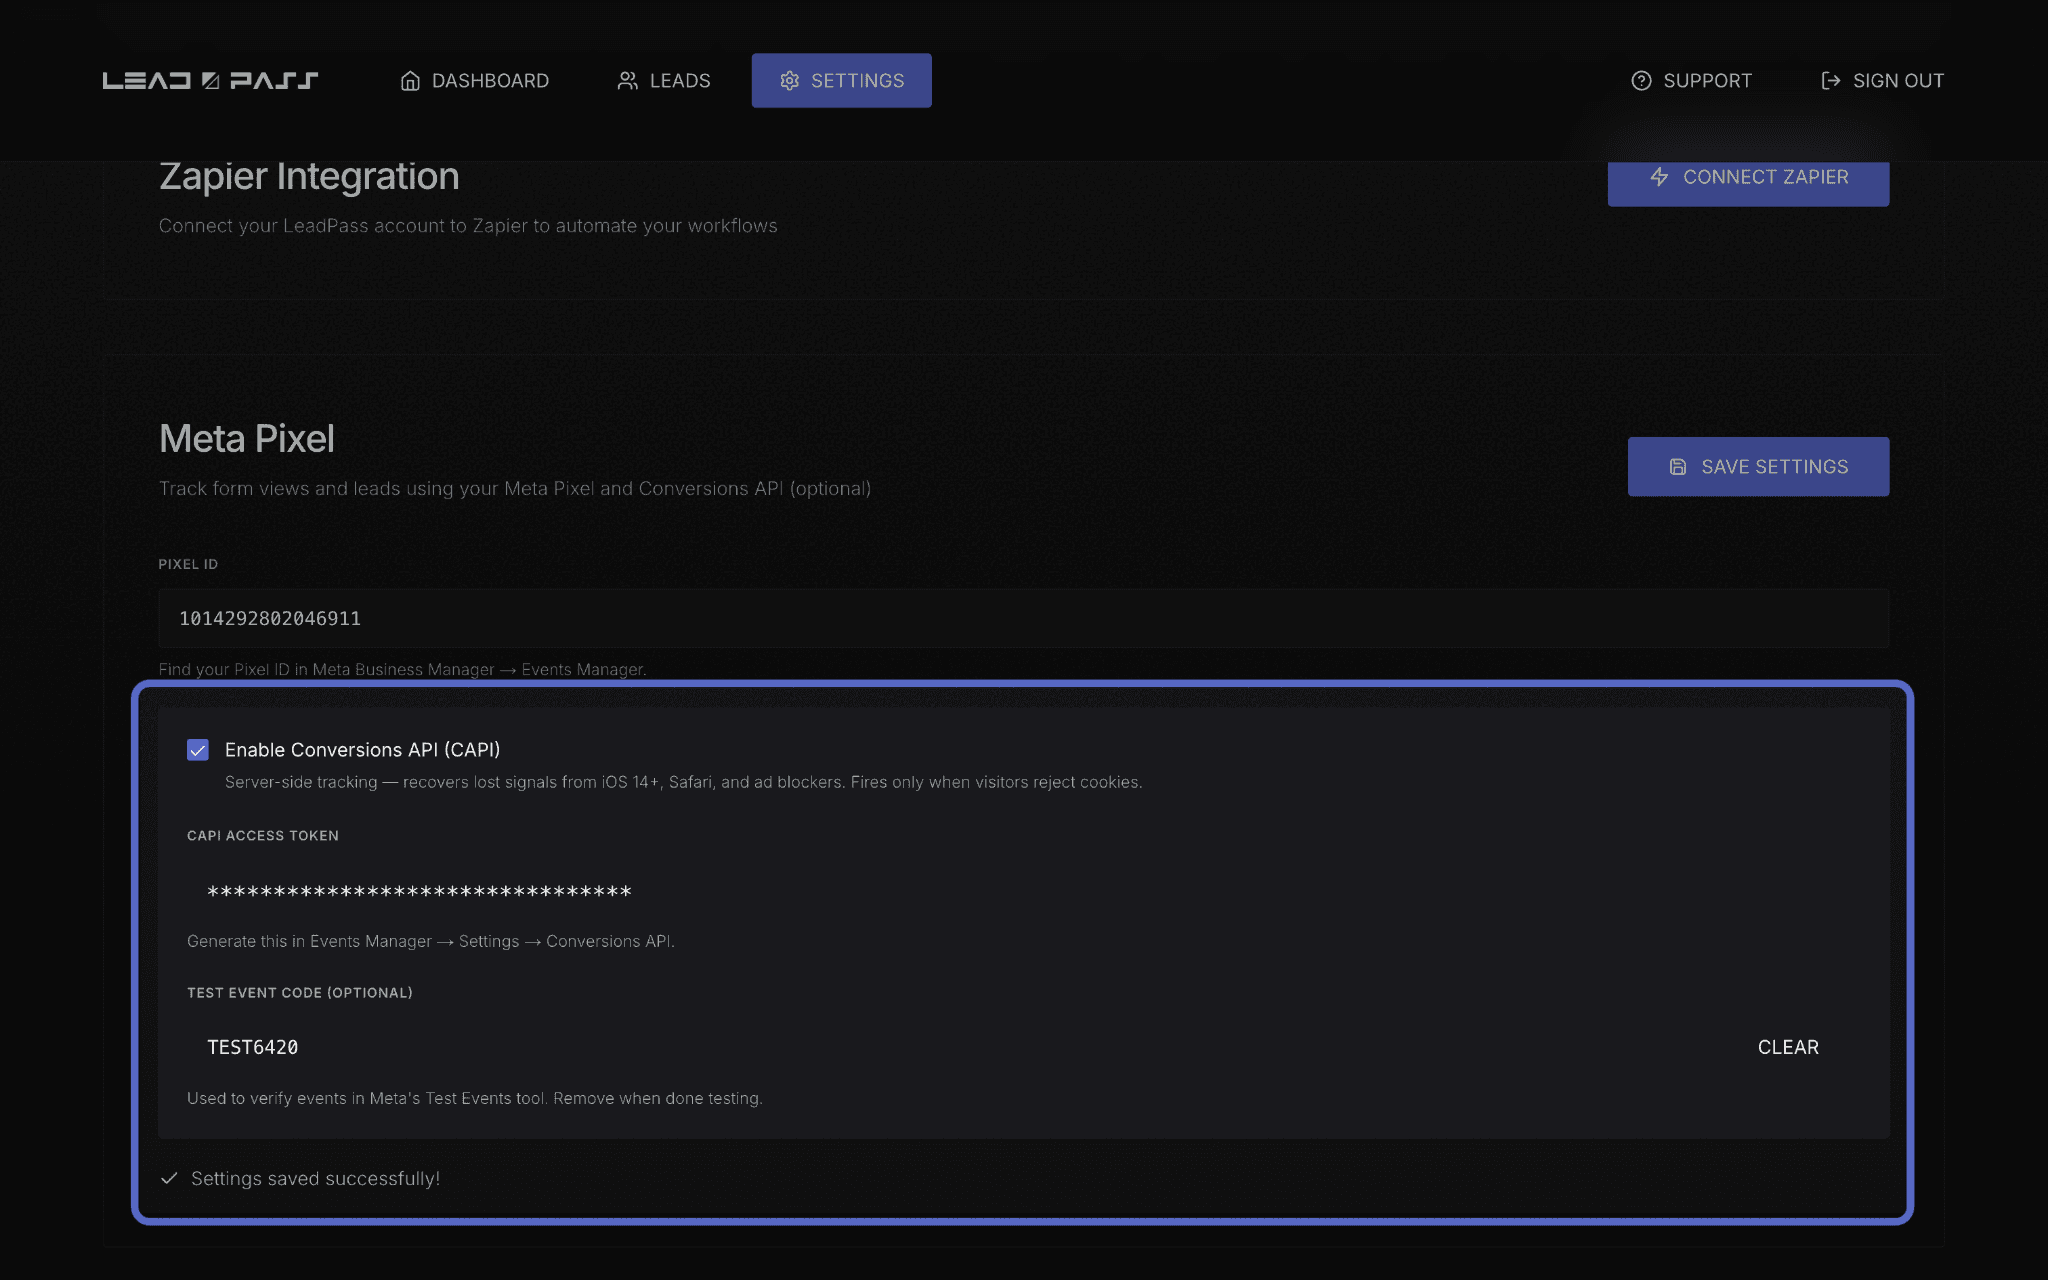
Go to Settings → Meta Pixel
Paste your code into the Test event code (optional) field
Click Save Settings
Verifying events are firing
With your test code in place:
Open one of your published LeadPass forms in a new browser tab
View the form, and if you want to test lead-capture tracking specifically, submit it
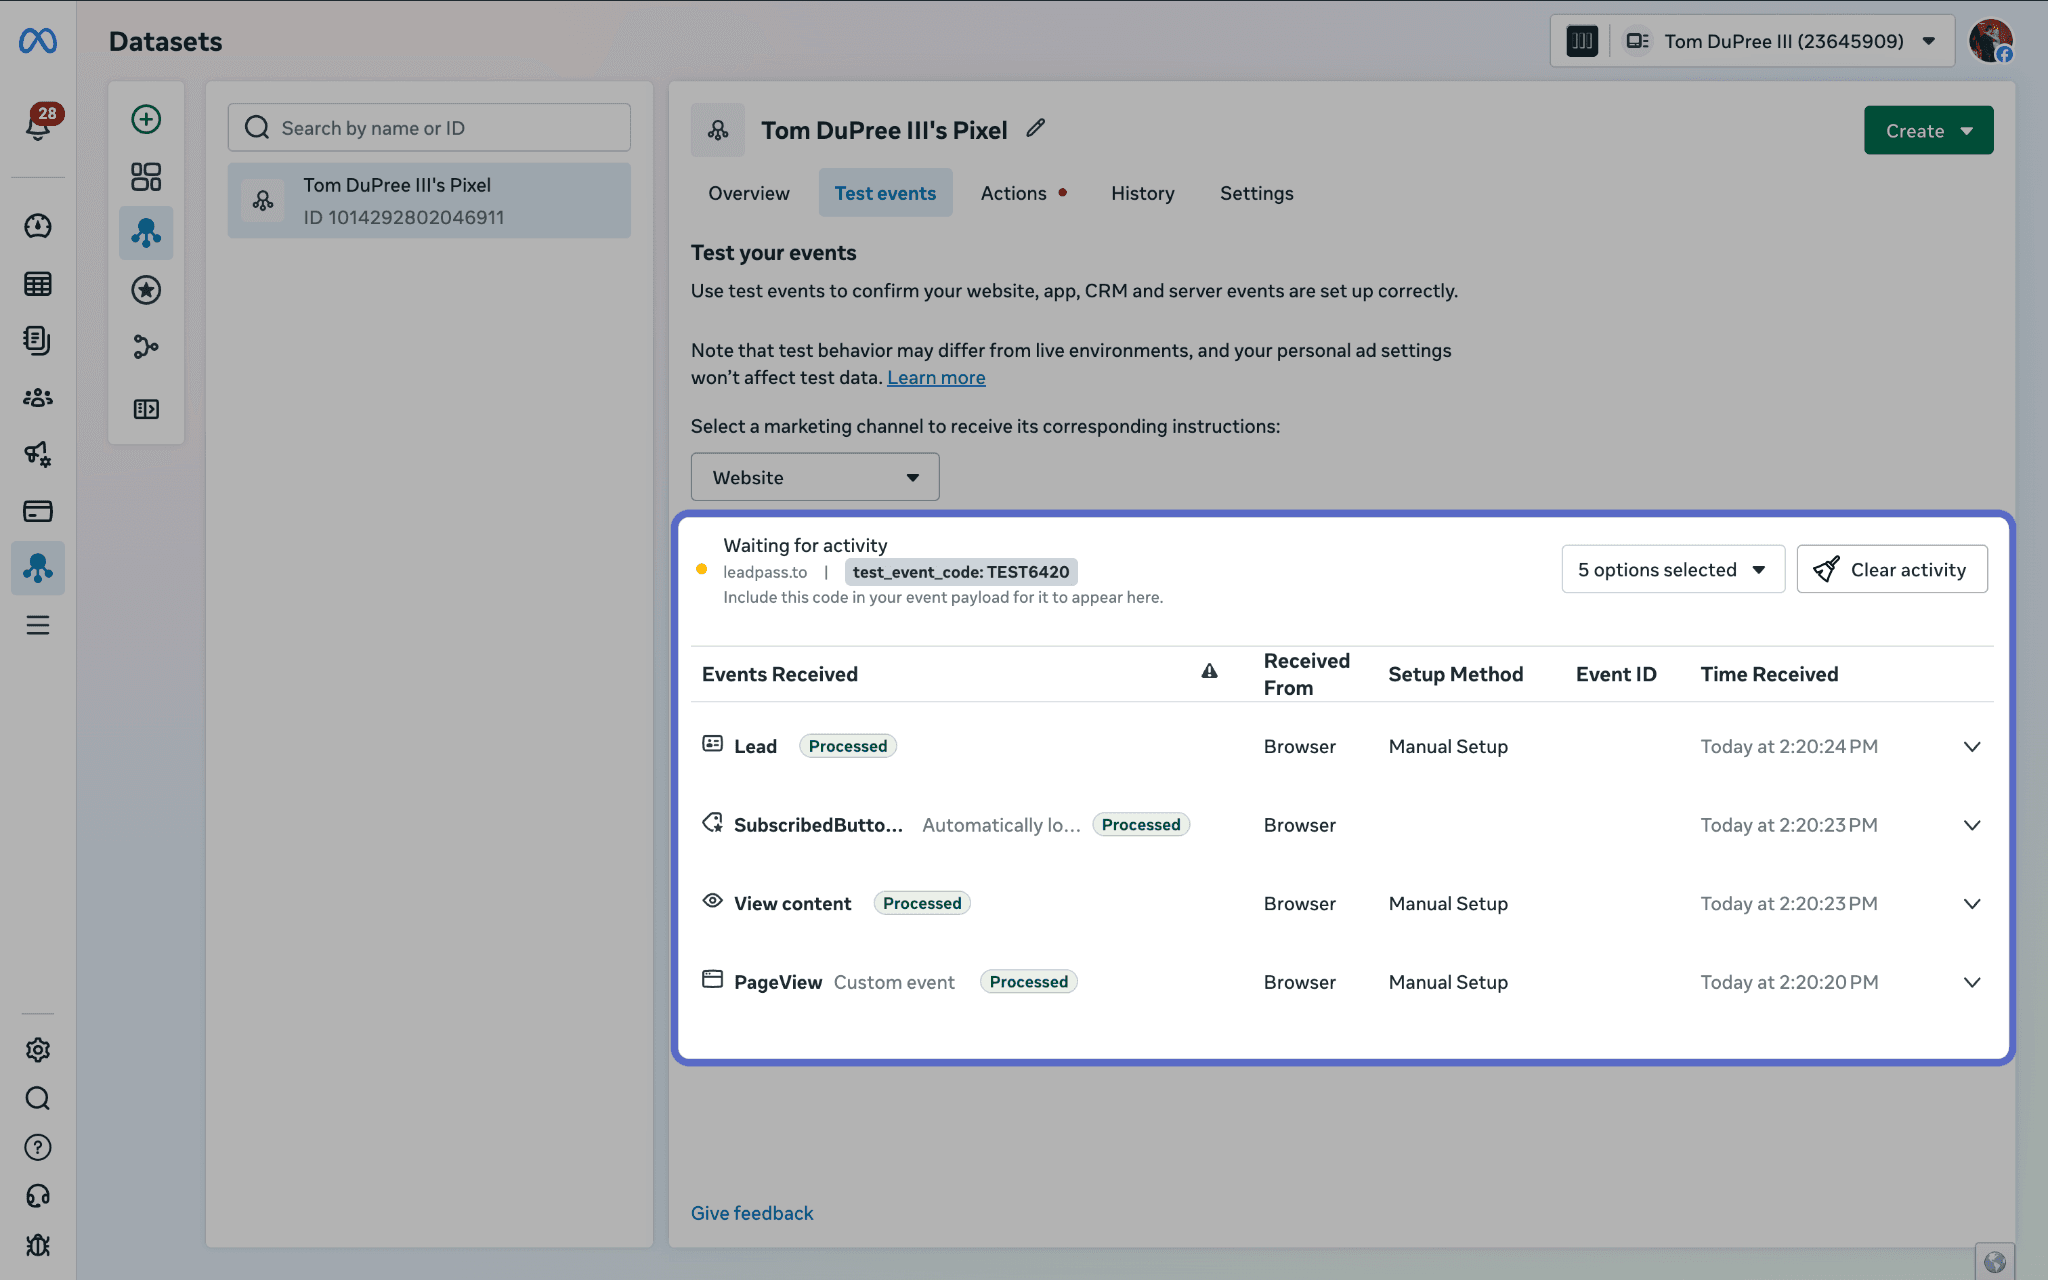
Go back to Meta's Test Events tab, select Website, and confirm the events show up there in real time
If nothing appears after a minute or two, double-check your Pixel ID and (if you're using it) your CAPI access token are both entered correctly under Settings → Meta Pixel — a typo in either is the most common cause of missing test events.
If you have confirmed all settings are saved correctly (and you have LeadPass cookies enabled), double check your browser settings to ensure you are not using any ad blockers or additional security features that might interfere with pixel tracking and reporting.
Cleaning up when you're done
Once you've confirmed everything is working, remove your test event code:
Go back to Settings → Meta Pixel
Click Clear next to the Test event code field
Click Save Settings
Leaving a test code in place doesn't break anything, but it's good practice to clear it once testing is complete — this keeps your setup clean and avoids confusion if you need to test again later.
What's next
With your pixel confirmed working, you're ready to use it for your Meta ad campaigns. If you're also setting up Zapier, head to Setting up Zapier integration next to connect your forms to the rest of your workflow.